Showing posts with label vegetables. Show all posts

Sunday, January 29, 2012

A Wedding and a Recipe.

I have had an abnormal amount of people lately tell me they really enjoy my blog (humble brag) which has inspired me to pick back up the laptop and finger-peck away another post. I make no promises here as I have clearly not exhibited consistent blogging behavior in the past six months; I am in no place to make any pledges.


The good news about being so absent lately is that I have an abundance of new material to yap away about. I guess the most obvious material would be the fact that Zach and I decided to get hitched back in September.

The wedding was in Orlando, Florida September 18th. It was a great day. Everything was perfect, and no I am not referring to the devine coming together of months of planning and crafting cute little do-dads. I am referring to the spending of quality time with all the people we care about most in the world and those that care about us (minus the few that were unable to make it and dearly missed).

Here are some highlights from the day in case you are interested and have not been assaulted with Lindzachary wedding photos too much already via the magic of facebook.


We did a private yoga class the morning before the wedding:


Rehearsal dinner, a backyard BBQ (Sonny's BBQ, that is) at Zach's parent's home:


The ceremony:


The portraits:


The reception décor...tables had names instead of numbers like "Jeff Goldblum: Zach kind of looks like him, Lindsey Kind of likes it.":


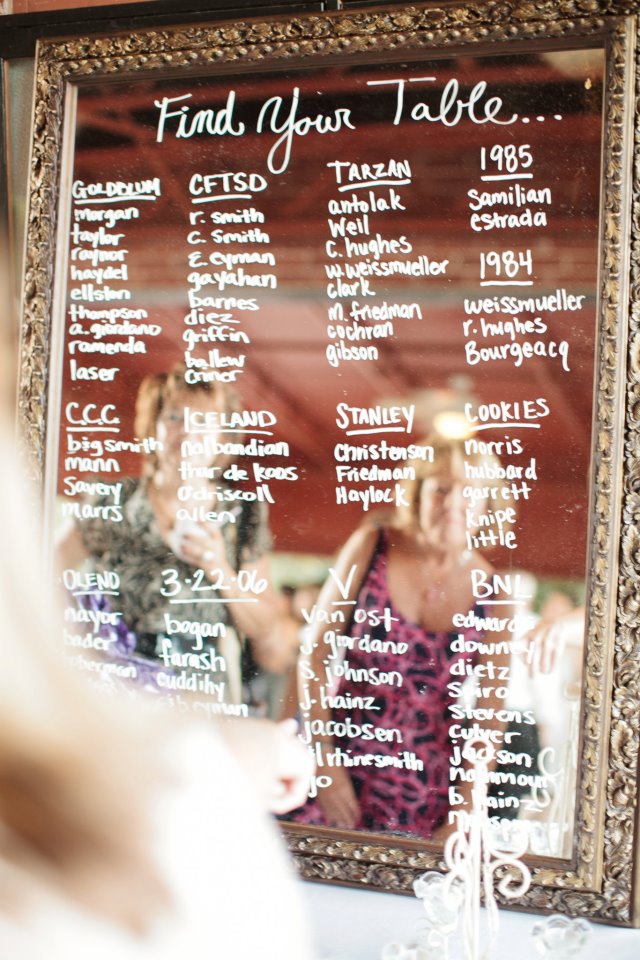


The party:


A couple if insider trading secrets from the day include:

The call to go through with the outdoor ceremony was made when it was still raining outside at 3:30pm for a 5:30pm ceremony. We had grandmothers on both sides of the family praying for sunshine, and boy did we get it. The weather was beautiful, and the rain from the whole first part of the day actually made the area nice and cool for the ceremony.

For pre-wedding gifts, Zach gave me a beautiful necklace with a thin gold chain and a garnet stone. I will wear it to any wedding I ever go to. I gave him a leather-bound book with blank pages and “Weissmueller” pressed into the leather on the cover. We wrote our vows in there and will write a little something to each other in there each year on September 18th.

We put ourselves through about 5 weeks of pre-marital counseling sessions in the months leading up to the wedding. I know this sounds like TMI, but I genuinely enjoyed our time doing it, and would recommend it to anyone. I know it is not for everyone. It was just really nice to talk to a neutral third party about our relationship. It is kind of a rare experience because if you think about it, anyone you or your partner might go to for wisdom or advice will have some sort of angle, bias or be sensitive to certain things they already know about you. It was really interesting to talk with someone who was a blank slate with us.

Planning a wedding out of state is not so bad. I know it sounds like it would really complicate things, and it certainly did. But there is something to be said about keeping your distance from the location of the wedding for the entire time you are engaged. It definitely keeps things in check since it is kind of impossible to get carried away when there are some things you just cannot physically accomplish from the opposite side of the country. The downside was that I definitely missed out on some fun wedding-planning related outings you tend to take with bridesmaids and family, but we managed to squeeze most of them in during the days I was in town to work on wedding things. The other stipulation (and it is a big one) is that I had a dream team of Orlandonites led by the mother of the groom herself that made the personal style of the wedding possible. I also had the worlds best wedding coordinator (if-you-are-having-a-wedding-in-florida-call-me-and-i-will-put-you-in-touch-because-you-cannot-do-it-without-her-I-don’t-think).

While the details of the bachelorette party shall remain under wraps, I will say there was a 3am (approximately) Domino’s pizza delivered to the house where we were staying. While I loved the whole bachelorrette party, my favorite part was sitting around the kitchen table with about 8 girls sharing one pizza giggling about the events of the evening. A slice never tasted so good.


We did not hire a videographer (pictures were more important to us), but our friend, Case, did record just our vows during the ceremony.

We wrote our own vows. They took up the majority of the ceremony. It was my favorite part of the day.

I am pretty proud of the fact that the "single lady" who "caught" my bouquet in the bouquet direct pitch, I mean toss, will in fact be the next to marry. We look forward to returning to Orlando for Rachel and Chris' wedding later this year. You're welcome.


Succotash has catapulted to the top of my list of favorite side dishes. So when Food Network Mag had a recipe using it, I decided to make the whole meal, including the delicious-looking pepper-jack stuffed chicken breasts. The whole meal is just, well, pretty. This meal looks more intense than it really is. It doesn't take long to prepare, and the payoff is really nice. Plus, succotash keeps in the fridge for a good week to serve as a side dish for other meals so make a bunch.


This recipe is from over a year ago in the magazine, and my husband was not even my husband when I made this meal. It must have been over the summer. Yikes it has been a long time since I have written. I have since made this and my previous succotash recipe using frozen edamame instead of lima beans. I have to say is superior to the limas. Edamame is a rich and buttery bean packed with all sorts of good-for-you stuff. Just make sure the frozen edamame are not in the pods, but peeled. They should be lose in the bag. They look and feel exactly like lima beans, but they have a deeper green color (similar to the color of green beans) and more flavor.

Chicken:
4 ounces pepper-jack cheese, shredded
2 cups baby arugula, roughly chopped
2 large skinless, boneless chicken breasts (12 ounces each)
1 tablespoon olive oil, plus more for brushing
Kosher salt
1 1/2 to 2 tablespoons Cajun spice blend
Vegetable oil, for the grill

Succotash:
1 cup frozen lima beans, thawed (I like to substitute frozen peeled edamame)
1 medium yellow summer squash, diced
2 cups corn kernels
1 cup grape tomatoes, halved
4 strips of bacon (I added this part, but believe me it makes it even better!)
Juice of 1 lime (I did not use this since I was using bacon, but you should use this is you don't add the bacon)


Instructions:
Combine the cheese and arugula in a bowl. Cut a deep 2-inch-wide pocket in the thickest part of each chicken breast with a paring knife. Stuff with the arugula mixture. Brush with olive oil and season with salt and the Cajun spice blend.

Preheat a grill to high and brush the grates with vegetable oil. Grill the chicken until blackened and a thermometer inserted into the thickest part registers 155 degrees F, 8 to 10 minutes per side. Transfer to a cutting board.

Meanwhile, heat 1 tablespoon olive oil in a skillet over high heat or if you are using bacon, just cook it until crisp (the fat from the bacon will serve as the "oil" in this case) --- then take out the bacon and crumble it up, leaving the grease in the pan. Add the lima beans, squash and corn, season with salt and cook until the squash is just tender, 2 to 3 minutes. Add the tomatoes and crumbled bacon and cook 2 more minutes. Remove from the heat and stir in the lime juice (if you did not use the bacon).

Slice the chicken and serve with the succotash.

Saturday, June 18, 2011

Summer Sides - Shallot/Lemon Brown Rice with Toasted Pine Nuts and Roasted Zaatar Carrots

I have always been all about the sides.


When you have a habit of wanting to taste the food on everyone's plate at the table, side dishes are important to you. They offer variety in a meal. Sure, the hunk of beef, chicken breast or fish maybe are delicious, but the side dishes really bring out the best in the main dish. I always like to have at least two sides, and one of them has to be special.

For this casual Sunday evening dinner, I was making some super easy tilapia with some herbs de provence and lemon rub. I decided to focus on some more adventurous sides. They both were very flavorful and turned out very well. I loved the zaatar carrots because the natural sweetness in the carrots contrasted the tangy kick of the zaatar spices; this made for such an interesting combination. I imagine you could substitute any vegetable for carrots like asparagus, zucchini, potatoes, etc. I also made brown rice with lemon, shallots and toasted pine nuts....yummmm. Yes, it was good.


Zaatar Carrots

(Serves 4, recipe from "Food Network Magazine")

Preheat 2 baking sheets in a 450 degree oven. Quarter 4 pounds carrots lengthwise and toss with 1/4 cup olive oil and 3/4 teaspoon each salt and pepper. Spread on the hot baking sheets and roast until browned, 18 to 20 minutes. Toss with 4 teaspoons za'atar (a spice blend available at Middle Eastern markets), 3 tablespoons chopped parsley and the juice of 1 lemon.


Brown Rice with Lemon, Shallots and Toasted Pine Nuts

(Serves 4, recipe from "For the Love of Cooking")

2 tbsp pine nuts
1/2 tsp olive oil
1 shallot diced finely
1 tsp lemon zest divided in two
Brown rice prepared per instructions (use vegetable or chicken stock to cook the rice - it's much more flavorful). Also, add 1/2 tsp of lemon zest to rice while cooking.
1 tsp butter
Salt and pepper to taste

While the brown rice is cooking, add pine nuts to a DRY skillet over medium heat. Toast the nuts stirring often, until they are golden brown 2-3 minutes. After the nuts are finished cooking, remove from pan and set aside. In the same pan add the olive oil over medium heat. Add the shallot and cook until soft and tender. They cook fast so stir them often. Once rice is finished cooking, add pine nuts, shallots, the remainder of lemon zest, butter and salt and pepper to taste.

Tuesday, November 30, 2010

Thanksgiving 2010 - Vegetable Tian Time + a Tribute to Southern California

Quite possibly what I love most about Southern California is the fact that you can drive an hour or so in any direction and be in a completely different world.


To the NORTH, you have Santa Barbara, an upscale costal town with mountains, great restaurants, a beautiful pier, bike trails, shops, wine and a sophisticated beach bum attitude as well as the Malibu Mountains where you will find anything from a beautiful dam on a hike to a line of buddhist monks at the Getty Center Gardens.


To the EAST, you have the dessert areas like Palm Springs (a chill desert town with a retro-chic charm and a huge casino), Joshua Tree (a small hippy-ish native town with a huge unspeakably beautiful national park for hiking, camping and awwwwing), other desert towns (where you can do things like apple-picking or gambling at random casinos) and Big Bear Lake in the mountains (great for hiking, kayaking and other water sports in the summer, snow skiing in the winter and lama petting!).


To the SOUTH, you have charming coastal towns like La Jolla (where the seals literally sun bathe on the shore). New Port, Huntington, Seal Beach and Laguna are all worth while destinations for weekend trips that might include surfing, relaxing, shopping and whale watching. You might even prefer the small-town life in a place like Jullian, famous for their apple and berry pies. Travel slightly farther south, and you will reach beautiful San Diego...slightly farther to reach Mexico!


To the WEST (southwest), you have Catalina Island which is a gorgeous small island off the coast of Long Beach. Catalina is extra romantic and relaxing, but you can always occupy yourself with the beach, SCUBA, fishing, walks through the gardens and the casino...unfortunately, I cannot find my pictures from Catalina. I will just have to go again soon I suppose!

The amazing thing about these each-completely-different pictures is not that they are all in California (the state is huge!), but that they are all within day-trip distance of Los Angeles (2 hours or less). I wanted to expand to all of California (or weekend-trip distance), we would have a completely different situation on our hands! I would include places like Mammoth Mountain for skiing, San Francisco or even Las Vegas (which is slightly out of state, but still just under 4 hours driving. This place is crazy!

Part 3 of our Thanksgiving adventure takes place in a town just southeast of Los Angeles called Temecula. Temecula is one of the wine countries of Southern California, reaffirming the southern California mentality that you can, in fact, have it all. I couldn't believe this area even existed. I loved traveling to Northern California and visiting Sonoma and Napa wine country the few times I went. It seemed like such a unique experience and great way to spend a relaxing day just frolicking from winery to winery casually sipping on wines that took the winemakers years to perfect. Then you say something like, "I like this one...has a bite to it...now THIS one...it has less of a bite at first but then it kicks in after a few seconds." I, of course, don't really know what I am talking about, but it is fun to compare the wines once you have started to try them. It is also fun to take a little piece of the experience home with you when you buy a bottle...or two...or three...or....


I must be fair and say Temecula is no Napa. It is less beautiful and the wineries do not have the reputation of the northern California wineries. However, it is the perfect substitute when you consider the time it takes to travel to Northern wine country and the lack of knowledge I possess about the difference between a taste of a good wine and of a great one (if that barrier even occurs here...like I said...I cannot tell). I decided to take my parents to Temecula for some lunch on the terrace of a winery that overlooks the Temecula valley and some tastings of our own. It was a really nice time, and we got back to town just in time for a Lebanese feast at one of my favorite restaurants, Pi which was followed by a trip to the Planetarium show at the Griffith Park Observatory. Phew! It makes me tired just recapping it.

The final recipe I will share with you from my Thanksgiving feast was the first recipe I decided on making. As you can see, it was at the top of my list on the chalkboard:


Vegetable Tian is something I have never heard of before. I am still not entirely sure of what it means, but it seemed like the perfect side dish (not only for Thanksgiving, but for anytime of year). The recipe I used was from a really great cooking blog I came across called For the Love of Cooking. This was one of several recipes I will be trying from this site. I am especially drawn to the roasted chicken recipes she has posted...there are some unique and delicious sounding ideas I am excited about. The result for this dish was so pretty and tasty as well. It is just a great way to get in your starch and veggie sides in one fancy-looking dish. The one thing I regret is prepping this one ahead. I baked it half way (without the cheese) the day before, and then I continued the day of. The cooking times were all off because I was putting a cold dish into the oven on Thanksgiving day instead of a pipping hot one (because you are normally just taking it out to put the cheese on and then returning it to the oven). The result was still tasty, but my potatoes did not end up cooking properly so we were forced to get by on only the mashed potatoes and sweet potatoes on the table this year.


Vegetable Tian

(recipe exactly from For the Love of Cooking - serves 6)

2 tbsp olive oil (divided)
1 large sweet yellow onion cut in half and sliced
2 cloves of garlic, minced
1-2 russet potatoes, unpeeled
1 zucchini
1 yellow squash
3 large Roma tomatoes
Sea salt, freshly cracked black pepper, to taste
Dried thyme, to taste
1/2 cup of grated Parmesan cheese

Preheat the oven to 375 degrees. Coat a baking dish with olive oil cooking spray. Heat 1 tbsp of olive oil in a large skillet over medium heat. Once hot, add the onions and saute until translucent, about 8 minutes. Add the garlic and cook for another 60 seconds. Spread the onion mixture on the bottom of the greased baking dish.
Slice the potatoes, zucchini, squash and tomatoes in 1/4 inch thick slices. Layer them alternately in the dish on top of the onions, fitting them tightly into a spiral, making only one layer. Season with sea salt, black pepper and dried thyme, to taste. Drizzle the last tablespoon of olive oil over the top.
Cover the dish with tin foil and bake for 35 minutes, or until the potatoes are tender. Uncover and sprinkle the Parmesan cheese on top and bake for another 25-30 minutes or until browned.


*I forgot to et a close up of the dish with my camera, but my dad snapped this shot with his phone. I guess I got a little tired of taking pictures by the time it came out of the oven. The good (read: great) news is that the blog link for the original recipe has a beautiful picture that I could never duplicate anyway. So look to that for inspiration, and enjoy!

Thursday, November 25, 2010

Thanksgiving 2010 - Green Bean Casserole Time

I realize this is a little late, but I have some great Thanksgiving recipes for you.


The good news is most of these dishes, you can make anytime of year. Of course you are welcome to make a huge turkey and gravy anytime of year, but those dishes are better left to have something to look forward to each November.

My parents visited for Thanksgiving this year which I could not be more excited about. When preparing a Thanksgiving feast, little to no consideration goes into how many people will be at my table. My turkey is 13 lbs, they only sell Yukon Gold potatoes by the 1 1/2 lb, and 1/2 of my aunts stuffing recipe still contains 2 lbs of beef. The good news is, I am hosting this dinner at my place this year which makes for quick and easy storage of leftovers to eat for weeks! There was a cutthroat process to limit f=down the dishes that ended up making it onto the table. I recently painted a wall in my kitchen with chalkboard paint, and I decided to map out the meal there.

I wrote out all my ideas and then went all "politician" on it, making "line-by-line" cuts to the budget...the only difference is, I actually did make cuts, significant cuts like slashing the rum cake, succotash and mac and cheese.


Truth be told, I wanted to be sure to make some dishes I haven't made before so that I could share them on my blog. That is something I really appreciate about keeping this blog; it keeps me on my toes, trying new things instead of getting to complacent with my cooking comfort zone.

Green bean casserole is something I wanted to make from scratch this year. My dad has always been responsible for this dish when my whole family gets together, and it solely consists of cans: canned green beans, canned cream of mushroom soup, canned fried onions...oh a bag of chopped pecans as well. Now, don't get me wrong. I have learned to love this "dump and go" green bean casserole over the years, but I wanted to try to make it from scratch to see how it holds up. I used a popular recipe from Alton Brown, and I dare to say it was worth the extra effort. I may tweak it a bit next year by adding more green beans and also adding pecans (the way my dad does), but I highly suggest this recipe for the essential Thanksgiving dish.


I am particularly confident in recommending this recipe because it happened to be Zach's favorite dish at the table this year, even though he does not like green beans. There are several more recipes where this came from so stay tuned!

Alton Brown's Best Ever Green Bean Casserole

(recipe from Food Network's Alton Brown - serves 6)

For the topping:
2 medium onions, thinly sliced
1/4 cup all-purpose flour
2 tablespoons panko bread crumbs
1 teaspoon kosher salt
Nonstick cooking spray
For beans and sauce:
2 tablespoons plus 1 teaspoon kosher salt, divided
1 pound fresh green beans, rinsed, trimmed and halved
2 tablespoons unsalted butter
12 ounces mushrooms, trimmed and cut into 1/2-inch pieces
1/2 teaspoon freshly ground black pepper
2 cloves garlic, minced
1/4 teaspoon freshly ground nutmeg
2 tablespoons all-purpose flour
1 cup chicken broth
1 cup half-and-half
Directions
Preheat the oven to 475 degrees F.

Combine the onions, flour, panko and salt in a large mixing bowl and toss to combine. Coat a sheet pan with nonstick cooking spray and evenly spread the onions on the pan. Place the pan on the middle rack of the oven and bake until golden brown, approximately 30 minutes. Toss the onions 2 to 3 times during cooking. Once done, remove from the oven and set aside until ready to use. Turn the oven down to 400 degrees F.

While the onions are cooking, prepare the beans. Bring a gallon of water and 2 tablespoons of salt to a boil in an 8-quart saucepan. Add the beans and blanch for 5 minutes. Drain in a colander and immediately plunge the beans into a large bowl of ice water to stop the cooking. Drain and set aside.

Melt the butter in a 12-inch cast iron skillet set over medium-high heat. Add the mushrooms, 1 teaspoon salt and pepper and cook, stirring occasionally, until the mushrooms begin to give up some of their liquid, approximately 4 to 5 minutes. Add the garlic and nutmeg and continue to cook for another 1 to 2 minutes. Sprinkle the flour over the mixture and stir to combine. Cook for 1 minute. Add the broth and simmer for 1 minute. Decrease the heat to medium-low and add the half-and-half. Cook until the mixture thickens, stirring occasionally, approximately 6 to 8 minutes.

Remove from the heat and stir in 1/4 of the onions and all of the green beans. Top with the remaining onions. Place into the oven and bake until bubbly, approximately 15 minutes. Remove and serve immediately.

Sunday, April 18, 2010

Day of Fresh

My dad is one of my absolute favorite people in the world.


He is a generous, hard working and sensitive man. He and my mom sacrificed so much for my brother and me. Growing up, I have so many great memories from being a part of several sports teams to going on trips to other countries. I used to have big slumber parties at my house in middle school and high school with all my friends, and my dad would always have bagels and orange juice waiting for all of us by the time we made it out of our sleeping bags. My parents made all those memories possible, and I will always be so grateful for all they have provided.


Here I am, living in LA as an adult, and my dad never stops giving. I was fortunate enough to have him in town all weekend. He spent his Sunday afternoon teaching me to start my own vegetable garden. He works in the plant business so I knew he would know what to do. I have always wanted to start a vegetable garden, something simple. But I didn't know how to start a successful one. My dad showed me how to turn up the soil, get rid of the weeds, fertilize and plant stakes to tie the vegetable to as they grow. Here is the short version:

Here is what you will need:
3 big bags of soil
1 cup fertilizer (to get started)
1 roll of gardening sheet (resembles a black plastic bag material) which is for keeping the weeds from growing
long wooden stakes
a shovel and a hook rake
vegetables and herbs!

Let's start with the before shot:


Pull all those weeds out from the root, and churn up the dirt to loosen it; go as deep as you can. Then put about 1/2 of your fresh soil on top.

Roll out the black material (it looks like a black garbage bag but is breathable so the water will go through, but the weeds cannot grow through it.

Place the other half of the fresh soil on top of the black material:


Toss the cup of fertilizer all over the surface of the soil (you will need to repeat this every month).

Stick a long knife into the ground and cut a "T" into the material where you want to plant a vegetable. Clear a space for it by moving some soil out, and place the plant into the ground. The base of the plant should be below the black material, and the stem should come out of it:


Spread the dirt back around the base of the plant, and press down gently.

Don't plant the vegetables too close together. The herbs can be a little tighter.

I will let you know how this all progresses, but I think we are off to a great start.


Water heavily at first:


This is about a 4'X3' area, and I have heirloom tomatoes (green and red), red, yellow and green bell peppers, zucchini, mint, cilantro and scallions. We put a little fence around the area as to keep the cats and dogs out of the patch.


I decided to make a nice light meal with vegetables (mixed potatoes and asparagus) and fresh ground almond from the Santa Monica Farmers' Market.


Besides, we had to save room for our inevitable trip to yogurtland. I just really had a great day with my dad, and I couldn't be happier.


One Fantastic Day Almond Crusted Tilapia:

4 Tilapia filets (this can be any comparable white fish)
1/4 C canola or vegetable oil
3/4 C ground almond (this can work with ground pecans as well)
2 eggs, beaten
salt and pepper to taste

Preheat the oven to 400 degrees F.
Put he beaten eggs in one shallow bowl and the ground almond in another.
Pat fish to dry.
Dip a filet in the egg.
Allow excess to drip off before placing it into the dish with the almond. Coat the entire surface with the ground almond by flipping it over a couple times.
Repeat this with all 4 filets.
Heat oil in a large heavy pan over med-high heat.
Place the filets in the pan, and cook on each side for 30 seconds.
Move pan (if oven safe) to the oven. (If pan is not oven safe, you can place filets on a baking sheet instead).
Bake at 400 degrees F for about 3 minutes for small filets and 4-5 minutes for large ones. The fish should flake apart easily.
Sprinkle some fresh ground almond on top!