Showing posts with label potato. Show all posts

Sunday, March 18, 2012

Homemade Fast Food: Tater-Tot Casserole

Zach and I had tots....


Lot's of tots... in this tater-tot casserole recommended by none other than our I-am-just-going-to-go-ahead-and-call-them family-even-though-Zach-won't, Chris and Rachel...Rachel recommended them in an "I-made-this" sort of way and Chris recommended this in an "I-ate-this" sort of way.

Juicy ground beef topped with crispy tater tots and melted cheese. Can we call this what it is? Homemade fast food. Delicious! No one eats more fast food than Zach and I. While I love to cook and even manage to update this blog once in a while, most days we are bringing food home from places all over the city. I even noticed this morning that Wing-Stop and Pappa Johns are among our "most visited" websites (as defined by our google chrome homepage).


Rachel managed to make a healthier version of this genius dish by using the healthier version of everything in the dish, but I didn't bother. I think I will lighten it up a little next time by throwing some vegetables into the meat mixture and using extra lean beef since I basically felt like I couldn't move after eating this, but it sure was worth every bite. Oh, and it was probably the easiest thing I have ever made.


Tater-Tot Casserole
Recipe by Craving Comfort
feeds 3-5 people


1 lb lean ground beef (I would use very lean maybe up to 1 1/2 lbs)
1/2 medium onion, chopped
1 (10 1/2 ounce) can condensed cream of celery or cream of chicken soup (undiluted) - i did not use the whole can
1 16oz package frozen tater tots
1 cup shredded cheddar cheese
salt & pepper

Preheat oven to 375 degrees.
Brown ground beef. season with salt & pepper. - do not break it apart completely...leave some nice meaty chunks in there
Add chopped onion, cook until tender.
In a casserole dish, combine ground beef mixture & cream soup.
Top mixture with tater tots.
Bake , uncovered, for 30-40 minutes till bubbly and Tots are golden brown.
remove from oven & top with cheese, return to oven until melted.

Tuesday, November 30, 2010

Thanksgiving 2010 - Vegetable Tian Time + a Tribute to Southern California

Quite possibly what I love most about Southern California is the fact that you can drive an hour or so in any direction and be in a completely different world.


To the NORTH, you have Santa Barbara, an upscale costal town with mountains, great restaurants, a beautiful pier, bike trails, shops, wine and a sophisticated beach bum attitude as well as the Malibu Mountains where you will find anything from a beautiful dam on a hike to a line of buddhist monks at the Getty Center Gardens.


To the EAST, you have the dessert areas like Palm Springs (a chill desert town with a retro-chic charm and a huge casino), Joshua Tree (a small hippy-ish native town with a huge unspeakably beautiful national park for hiking, camping and awwwwing), other desert towns (where you can do things like apple-picking or gambling at random casinos) and Big Bear Lake in the mountains (great for hiking, kayaking and other water sports in the summer, snow skiing in the winter and lama petting!).


To the SOUTH, you have charming coastal towns like La Jolla (where the seals literally sun bathe on the shore). New Port, Huntington, Seal Beach and Laguna are all worth while destinations for weekend trips that might include surfing, relaxing, shopping and whale watching. You might even prefer the small-town life in a place like Jullian, famous for their apple and berry pies. Travel slightly farther south, and you will reach beautiful San Diego...slightly farther to reach Mexico!


To the WEST (southwest), you have Catalina Island which is a gorgeous small island off the coast of Long Beach. Catalina is extra romantic and relaxing, but you can always occupy yourself with the beach, SCUBA, fishing, walks through the gardens and the casino...unfortunately, I cannot find my pictures from Catalina. I will just have to go again soon I suppose!

The amazing thing about these each-completely-different pictures is not that they are all in California (the state is huge!), but that they are all within day-trip distance of Los Angeles (2 hours or less). I wanted to expand to all of California (or weekend-trip distance), we would have a completely different situation on our hands! I would include places like Mammoth Mountain for skiing, San Francisco or even Las Vegas (which is slightly out of state, but still just under 4 hours driving. This place is crazy!

Part 3 of our Thanksgiving adventure takes place in a town just southeast of Los Angeles called Temecula. Temecula is one of the wine countries of Southern California, reaffirming the southern California mentality that you can, in fact, have it all. I couldn't believe this area even existed. I loved traveling to Northern California and visiting Sonoma and Napa wine country the few times I went. It seemed like such a unique experience and great way to spend a relaxing day just frolicking from winery to winery casually sipping on wines that took the winemakers years to perfect. Then you say something like, "I like this one...has a bite to it...now THIS one...it has less of a bite at first but then it kicks in after a few seconds." I, of course, don't really know what I am talking about, but it is fun to compare the wines once you have started to try them. It is also fun to take a little piece of the experience home with you when you buy a bottle...or two...or three...or....


I must be fair and say Temecula is no Napa. It is less beautiful and the wineries do not have the reputation of the northern California wineries. However, it is the perfect substitute when you consider the time it takes to travel to Northern wine country and the lack of knowledge I possess about the difference between a taste of a good wine and of a great one (if that barrier even occurs here...like I said...I cannot tell). I decided to take my parents to Temecula for some lunch on the terrace of a winery that overlooks the Temecula valley and some tastings of our own. It was a really nice time, and we got back to town just in time for a Lebanese feast at one of my favorite restaurants, Pi which was followed by a trip to the Planetarium show at the Griffith Park Observatory. Phew! It makes me tired just recapping it.

The final recipe I will share with you from my Thanksgiving feast was the first recipe I decided on making. As you can see, it was at the top of my list on the chalkboard:


Vegetable Tian is something I have never heard of before. I am still not entirely sure of what it means, but it seemed like the perfect side dish (not only for Thanksgiving, but for anytime of year). The recipe I used was from a really great cooking blog I came across called For the Love of Cooking. This was one of several recipes I will be trying from this site. I am especially drawn to the roasted chicken recipes she has posted...there are some unique and delicious sounding ideas I am excited about. The result for this dish was so pretty and tasty as well. It is just a great way to get in your starch and veggie sides in one fancy-looking dish. The one thing I regret is prepping this one ahead. I baked it half way (without the cheese) the day before, and then I continued the day of. The cooking times were all off because I was putting a cold dish into the oven on Thanksgiving day instead of a pipping hot one (because you are normally just taking it out to put the cheese on and then returning it to the oven). The result was still tasty, but my potatoes did not end up cooking properly so we were forced to get by on only the mashed potatoes and sweet potatoes on the table this year.


Vegetable Tian

(recipe exactly from For the Love of Cooking - serves 6)

2 tbsp olive oil (divided)
1 large sweet yellow onion cut in half and sliced
2 cloves of garlic, minced
1-2 russet potatoes, unpeeled
1 zucchini
1 yellow squash
3 large Roma tomatoes
Sea salt, freshly cracked black pepper, to taste
Dried thyme, to taste
1/2 cup of grated Parmesan cheese

Preheat the oven to 375 degrees. Coat a baking dish with olive oil cooking spray. Heat 1 tbsp of olive oil in a large skillet over medium heat. Once hot, add the onions and saute until translucent, about 8 minutes. Add the garlic and cook for another 60 seconds. Spread the onion mixture on the bottom of the greased baking dish.
Slice the potatoes, zucchini, squash and tomatoes in 1/4 inch thick slices. Layer them alternately in the dish on top of the onions, fitting them tightly into a spiral, making only one layer. Season with sea salt, black pepper and dried thyme, to taste. Drizzle the last tablespoon of olive oil over the top.
Cover the dish with tin foil and bake for 35 minutes, or until the potatoes are tender. Uncover and sprinkle the Parmesan cheese on top and bake for another 25-30 minutes or until browned.


*I forgot to et a close up of the dish with my camera, but my dad snapped this shot with his phone. I guess I got a little tired of taking pictures by the time it came out of the oven. The good (read: great) news is that the blog link for the original recipe has a beautiful picture that I could never duplicate anyway. So look to that for inspiration, and enjoy!

Wednesday, September 29, 2010

New Season. New Look. New Recipe.

I got a haircut.


This is not usually a notable event, but I really went for it this time. I had been thinking about it casually for a really long time. The other day...on the hottest day in LA history...I looked up a few salons (I wanted to go a step above my usual supercuts visit for this one), and went during my lunch break.

When I arrived at the salon, the hairdresser, Mino, seemed hesitant at first to lop off my extra-long and thick curls. I think he sensed that I was not entirely sure of my decision either. I finally gave him the go-ahead to chop away and within 10 seconds, my hair was on a low ponytail. Within another 5 seconds, my ponytail was in his hands...no longer attached to my head. I felt lighter and healthier all of the sudden, and there was no turning back. I had made the right decision.

I liked having long curly hair, but I thought a change would be nice, and it is. I don't know if I look particularly better with short hair, but I feel better at least for now.

BEFORE:


With my mom at a Florida Gator game a year ago; even though I like the change of the new cut, this picture makes me nostalgic for my old hair.

AFTER:


On my computer camera...Just woke up on a Saturday morning...I straightened my hair the day before. I think I will mostly be wearing it curly though...the straightening just makes the change that much more dramatic I suppose. It feels light and fresh for now, but I may get cold in the winter without my winter mane!

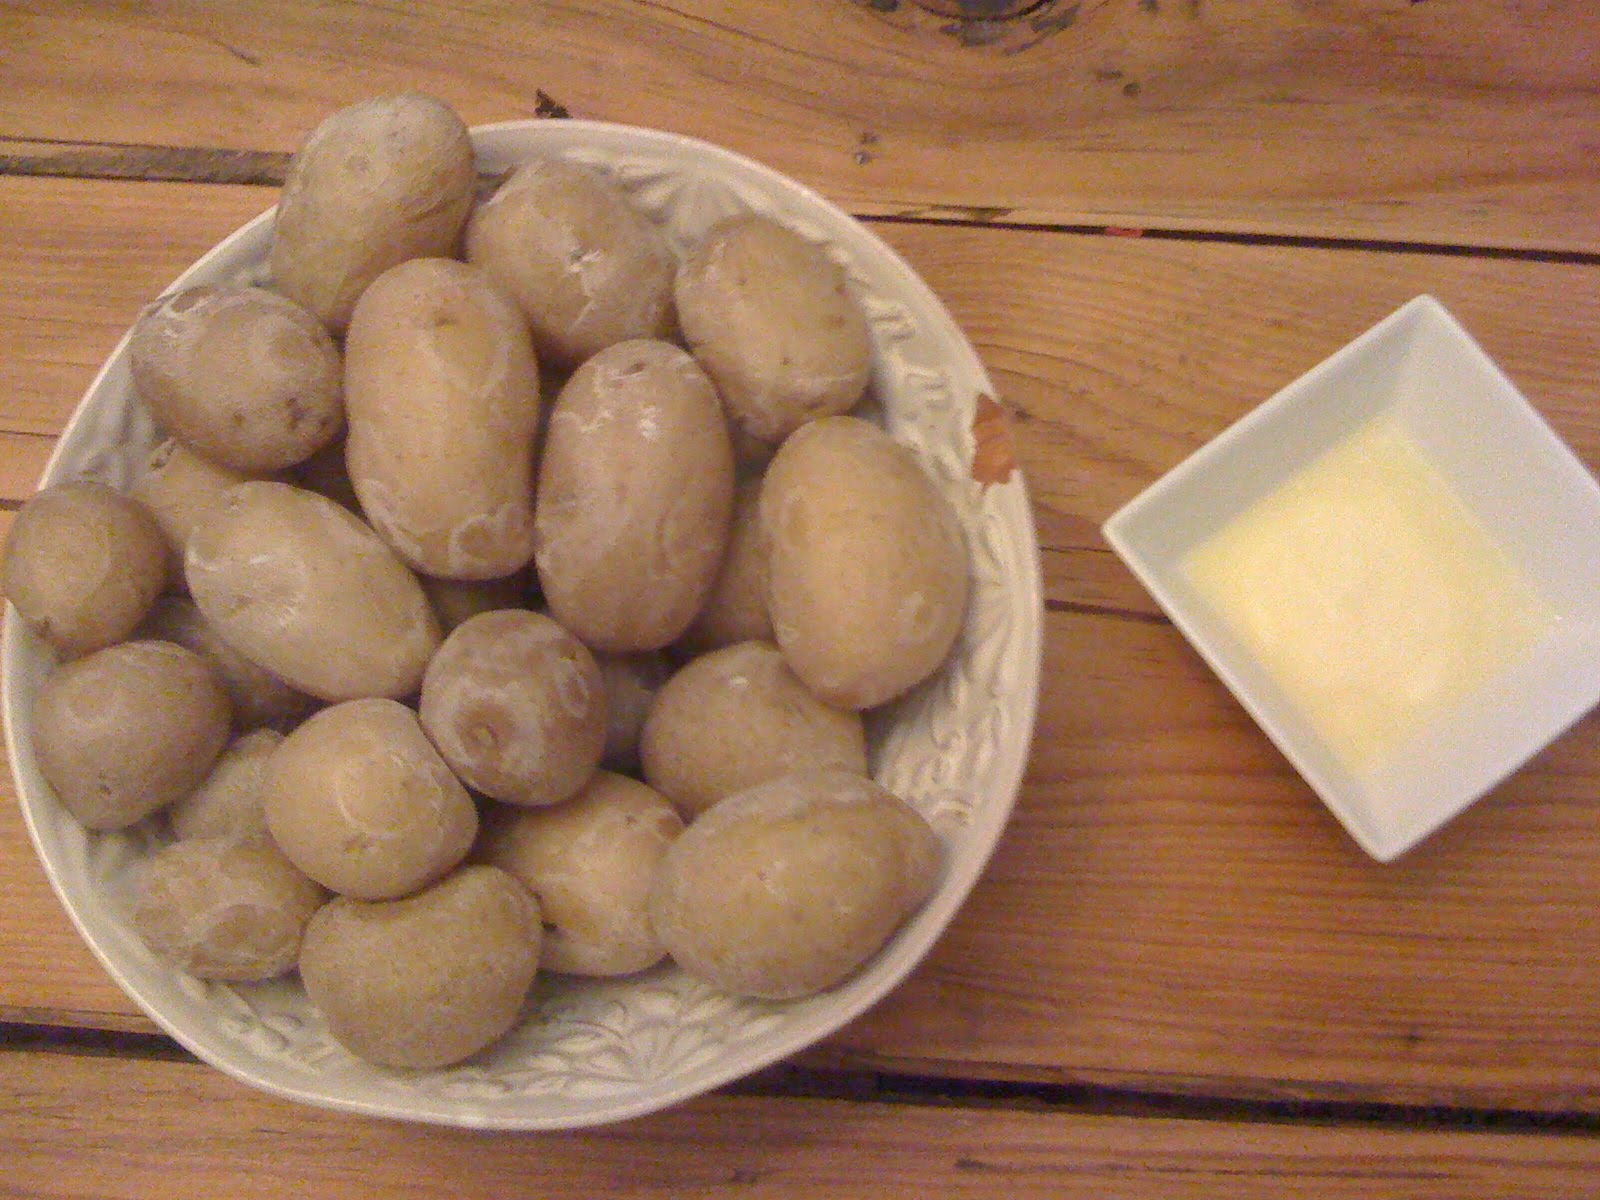
Have I inspired you to try something new? If so, you should try this simple recipe for potatoes. It is the easiest thing! This was in a little article from my June issue of Food Network Magazine that featured the city of Syracuse, NY. According to the article, the tasty dish originated with some Irish salt mine workers in Syracuse during the 19th century. They would drop some small potatoes into the piping hot brine at work for a cheap lunch. The result was a soft, creamy inside and a delicious skin, full of flavor from the salt. The wonderful texture can be attributed to the high heat the salted water is able to reach. Apparently, this dish (with a side of melted butter for dipping) is still a staple in Syracuse restaurants to this day.

This could not be simpler; it is as easy as boiling potatoes, but the salt changes everything. I made these salt potatoes to go with our beef tenderloin the other night, and then I mashed up the leftovers, adding sour cream and butter, to make mashed potatoes as a side to another dinner.


Syracuse Salt Potatoes

(recipe from Food Network Magazine - serves 8)

1 1/4 pounds salt (kosher or regular table salt is fine)
8 C water
2 pounds small fingerling OR yukon gold potatoes (any variety of small potatoes should work)
about a 1/2 C butter (for melting and dipping).

Pour the salt, water and potatoes into a large pot, and bring to a boil.
Cook until the potatoes are tender all the way through (about 20-30 minutes)
Drain the water, and allow potatoes to dry and cool.
Serve with melted butter for dipping!


Sunday, September 5, 2010

Take it Easy

Life is tough.


Cooking doesn't have to be. Sure, creating my own dishes seems overwhelming as I sit here and watch an episode of "Top Chef." But the reality is, no one, not even these contestants or judges, eat the kind of food they make on the show when they get home from a long day at work each night. I think the bread and butter of cooking are quick weeknight meals...the kind of meal you can put together in a half hour from start to finish and still sit down and enjoy afterwards.

This recipe was born out of my inexperience and need for convenience during my first year in LA. My apartment did not have an oven or a stove so I really had to put some thought into how I was going to make my own meals. I had a single plug-in burner so I couldn't ever have 2 pots that needed to be on the stove at the same time. My oven was smaller than the size of a microwave so I constantly needed to figure out half of recipes I would follow so they could fit into my mini-casserole dish.

This recipe can be altered so many different ways. I used to leave the potato out when I was watching my carb-intake. You could substitute the potato for a sweet potato. You could add a jalepeno for some added heat. You could use italian sausage and throw in some oregano, tomato paste or sauce and fresh tomatoes to give it an italian twist. Leave out the potatoes and put it over rice. Chop everything up ahead of time to cut your cooking time in half! Zach and I found this great little spice store in Santa Monica so I experimented with seasoning this dish with some smoked chili powder and smoked seas salt. Sausage is so flavorful so as long as you give the vegetables a chance to marry with the rich flavors of the sausage, you really cannot go wrong. Enjoy!

Skillet Sausage and Veggie Hash

(serves 4)


1 Package fully cooked chicken sausage such (4 links in a package, 12 -14 oz total), sliced across into 1/4 inch pieces
1 large head of broccoli (cut into florets)
1 red bell pepper, cubed
3/4 lb potatoes, cubed
1 white onion, cubed
4-5 cremini mushrooms, sliced
1/2 tsp smoked paprika
sea salt (to taste)
Olive oil for sautéing
fresh ground black pepper (to taste)

In a large pot, submerge potatoes in cold water and add a pinch of salt.
Place the pot over high heat and bring to a boil.
Boil potatoes uncovered until just tender throughout (about 10 minutes).
Remove from heat, drain and set aside.

While potatoes are boiling, add 1 tbsp olive oil to a large skillet over med-high heat.
Add the sliced sausage to the skillet, and saute until slightly browned.
Remove sausage from skillet, and set aside.
Add another tbsp olive oil to the skillet with the juices from the sausage, saute the boiled potatoes until they start to brown slightly.
Add the onions to the potatoes and continue to saute until onions are almost tender (about 4 minutes)
Add the rest of the vegetables to the skillet and continue cooking over medium-high heat until just tender (about 8 minutes).
Add the sausage back into the skillet, and mix well with the vegetables.
Turn heat down to medium-low, add the smoked paprika and continue mixing sausage around with the vegetables, giving the flavors a chance to meld.
Sprinkle with fresh ground pepper and sea salt to taste, and serve in a big ole' bowl!

Thursday, August 12, 2010

Getting Crafty

I like to be crafty...


...not in a sly or cunning way, but in an "I-like-to-make-crafts kind" of way. When I was in high school, I used to be obsessed with taking pictures at every gathering or event. I was convinced that it was my job to collect and organize the memories for everyone. I would do things like take pictures of other people in my class that I didn't even know just to preserve special moments, even if they weren't mine. I made a huge (and I mean busting-at-the-binding) scrap book for each year of high school. These scrap books are the most intense scrap book any high school student has ever made or ever will make in the history of scrap-booking. I challenge anyone to prove my wrong.

These babies are packed full of not only pictures, but ticket stubs, notes, sections of notes, programs, newspaper clippings, restaurant menus, yarn (long story), laminated badges, leaves, flowers and just about anything that would remotely fit between the pages of my books. I spent so many hours of my life over the course of each year collecting and putting together these books. I would sprawl out on the living room floor with my scissors, tape, boxes of pictures/papers and decorating materials and go to work. I would usually have some TBS weekend movie or a Survivor marathon on as I worked. I wouldn't move for hours from that spot; my legs would ache from sitting on the floor for so long. I was just so dedicated. I wish I had them to show you because I would say in a second those albums are worth every second I spent working on them. I not only have such great memories from my high school days, but I can also so easily access those memories by flipping through the pages of those books.

I just love diving into a new craft. I don't do things half-way either. I don't see a huge project as daunting by any means; it is a time to make use of my hands while I watch TV (I consider watching TV studying for me since I am working in the entertainment industry). I have mentioned before that I have started making aprons, a task that has been made much easier since acquiring a classic sewing machine from Zach's mom a few months ago. I even made curtains for my bedroom makeover (which will air on the USA Network's Character Fantasy August 21st - I will keep you posted!). I even had someone buy one of my fancy (or at least I try to be fancy) aprons!


Basically, I always have to have a crafty project going on in my life. I just completed (but am always adding to) my latest venture: a recipe/idea book.

The timeline for how this book came about goes like this:
1. I started to go to the gym regularly
2. I quickly became bored on the cardio machines, and started reading magazines...lots of magazines.
3. I started cooking (and this cooking blog) to save money and help stay healthy.
4. I started becoming really interested in finding new recipes.
5. I stated plowing through food blogs, all recipes and asking friends/family for good ones.
6. I started buying magazines for their recipes and decorating and travel tips instead of for their celebrity gossip and fashion advice.
7. I had stacks and stacks of papers and full magazines which had recipes I had marked as "something I want to try in the future."
8. I started this binder:


It is broken up into sections which include: appetizers, breads/breakfast, beverages, sweets, sides, chicken, beef, seafood and pasta. The papers/magazine tear-outs are all in plastic page protectors; this is great because I can take the page out and have it right on the counter while cooking without having to worry about the pages getting wet or messy.


I also included some sections for non-recipe related things like restaurants, travel, cooking tips and decorating ideas. I subscribe to 3 different magazines: Food Network, Good Housekeeping and Sunset Magazine (a gift from my dad!). Between those and the extra random ones I buy every now and then, my binder is growing faster than I can cook! For that reason, I throw out any recipes or ideas that I have tried and not liked to make room for the new ones. I can also throw out the full magazines (with my recipes ripped out, of course) without feeling like I should save them for just one article.


I turn to this binder when I need some inspiration. Just the other night I made a new recipe I put in that binder a while back from my Food Network Magazine for Skillet Rosemary Chicken. It was a great, low-maintenance dish that was satisfying. I made the recipe for four and then used the leftover chicken to make my Chicken Pita Salad. Success!


Too Easy Rosemary Skillet Chicken
(recipe from Food Network Magazine (slightly adapted) - makes 4 servings)

1 pound small red-skinned potatoes, halved, or quartered if large
Kosher salt
2 sprigs fresh rosemary, plus 1 tablespoon leaves
1 clove garlic, smashed
Pinch of red pepper flakes
Juice of 2 lemons (squeezed halves reserved)
2 tablespoons extra-virgin olive oil
4 skin-on, bone-in chicken breasts (6 to 8 ounces each)
10 ounces cremini mushrooms, halved
Fresh Ground black pepper

Preheat the oven to 450. Cover the potatoes with cold water in a saucepan and salt the water. Bring to a boil over medium-high heat and cook until tender, about 8 minutes; drain. Sprinkle with kosher salt and some olive oil and set aside.

Pile the rosemary leaves, garlic, 2 teaspoons salt and the red pepper flakes on a cutting board, then mince and mash into a paste using a large knife. Transfer the paste to a bowl. Stir in the juice of 1 lemon and the olive oil. Add the chicken and turn to coat.

Heat a large cast-iron skillet over medium-high heat. Add the chicken, skin-side down, cover and cook until the skin browns, about 5 minutes. Turn the chicken; add the mushrooms and potatoes to the skillet and drizzle with the juice of the remaining lemon. Sprinkle kosher salt and fresh ground black pepper to taste over everything.

Add the rosemary sprigs and the squeezed lemon halves to the skillet; transfer to the oven and roast, uncovered, until the chicken is cooked through and the skin is crisp, 20 to 25 minutes.

Tuesday, May 25, 2010

Farm(er's Market) Fresh Fried Potatoes

This is the only picture I have of the potatoes I made the other night.


Gone. All gone before I even thought to snap a quick pic. This has only happened once before and it was during my early food blogging days (see spinach and artichoke mac and cheese). These potatoes were delightful. They were flavorful with just the right texture: slight crisp to the outside and unbelievably creamy on the inside. Make these now (assuming you have a half bottle of corn oil, fresh sage, artichokes and 3 varieties of potatoes sitting around).

I bought the beautiful variety potatoes and fresh sage for this recipe (unfortunately not pictured) at the Santa Monica Farmer's Market. It is one of my favorite places to be early in the day on a Sunday. It is a big farmer's market that is made up of half farm fresh foods (fruits, vegetables, herbs, cheeses, eggs, nuts, beans, etc) and half prepared or made-to-order hot foods (pancakes, omelets, tamales, quesadillas, sausages, breads, coffee, crepes, corn, etc). There are also some boutique clothing and jewelry vendors sprinkled throughout. It is about a block from the beach in Santa Monica so the breeze is perfect for a hot day. Just ask Stanley...


There are farmer's markets are all over the city. I have seen bigger ones (Hollywood Farmer's Market on Sundays) and smaller ones (Larchmont Farmer's Market on Sundays) that I really enjoy, but the Santa Monica one has got a history with me. It is a big part of what made me fall in love with California the first time I visited. The idea of someday being able to go to the market any Sunday I wanted was just so appealing to me. I also used to dream about taking my dog for a walk around the area after eating a huge breakfast (the omelets are my favorite) because Santa Monica is probably the most dog-friendly areas in the city (even though they are not allowed in the actual market itself or even on the sand at the beach). It is every bit as delightful as I thought it would be, and Stanley looooooooved looking at the kites that were flying as we strolled down the walkway at the beginning of the sand. I still think about how I would love to live so close to the market that I could wake up and just walk there (Someday?).


If you find yourself in Los Angeles, this farmer's market is a must. I recommend the omelets (the biggest you have ever seen); they make it right in front of you as you tell them what you want in it. Oh, and the line is worth it. The pancakes are also huge and delicious with fresh blueberries. I rarely stray from either of those two things, but everything looks amazing so I don't think you can go wrong.


I have been meaning to make these potatoes for a really long time after reading about them on another food blog, Caviar and Codfish. It has a lot of great recipes and pictures that do them justice. You can find an original picture of these potatoes (instead of the one I have after they have been demolished by 6 hungry people) as well as the incredible meal that was made to go with them HERE .

Farm(er's Market) Fresh Fried Potatoes with Sage and Artichokes
(slightly adapted for convenience from Caviar and Codfish)

2 1/2 lbs potatoes, purple, new and fingerling
1/2 jar of artichokes, patted dry (original recipe called for about 8 fresh artichokes, but I didn't want to experiment with trimming them and prepping them properly this time around...the ones from the jar were fine for now, but I would like to try it again with the fresh ones)
1 handful (small), fresh sage leaves
corn oil, however much you need to almost submerge the potatoes in the pot...it was about 3/4 of a small bottle for me.
kosher salt (original recipe calls for fleur de sel which is probably best, but I didn't have any)
Shaved Parmesan cheese (optional - not part of original recipe)

Fill a very large skillet or heavy-bottomed pot halfway with corn oil and place over med-high heat.
Cut the potatoes into thirds or quarters (depending on the size of each - the cut potatoes should all end up as the same size before frying).
After about 5 minutes, add the potatoes to the hot oil (the recipe says the oil should be 350F-375F, but I did not have a way of knowing how hot the oil was so I just put the potatoes in at 5 minutes)
Leave the potatoes in the skillet/pot undisturbed for 5 minutes, and then stir with a long spoon (don't get splashed with hot oil!). The idea here is to shift the potatoes around in the pot so the ones cooking faster can switch places with the ones cooking slower in different positions in the pot.
Leave the potatoes alone again for 8 minutes. Meanwhile, take the artichokes out of the jar, and pat dry with a paper towel (or of course, prep your fresh artichokes).
After the 8 minutes, add artichokes and stir.
Continue to fry the potatoes with the artichokes 10-15 minutes.
When the potatoes start to turn golden and become crispy on the outside (go ahead, take one out, blow on it to cool and give it a try), add the sage leaves for the last minute of frying (they will become crispy really quickly).
Remove everything from the pot and drain on paper towels set out over either a baking sheet or paper bags.
Sprinkle with kosher salt (or better, as the recipe says, fleur de sel).
I also sprinkled some shaved Parmesan cheese over te top of the hot potatoes which i think worked well. The original recipe also suggests serving with lemon wedges which would be nice too.

BONUS! I was also making some jalapenos stuffed with cream cheese and wrapped with bacon at the time, so I scraped a couple chunks of toasted cream cheese that had been left on the baking sheet from that, and plopped them in the potatoes. It probably equaled less than a tablespoon of cream cheese, but I think it added a fun hint of flavor.

Thursday, December 3, 2009

What About Goats?

I love goat cheese. I feel as though it is also an "it food" that I failed to mention in my previous post, "It Foods."


In honor of goats and their amazing cheese below please find a few of my favorite facts about goats pulled directly from the amazing web page I found, Facts About Goats.


Goats were the first animals domesticated by man in 10,000 B.C

The phrase Judas goat is a term that has been used to describe goat that is trained to herd other animals to slaughter while its own life is spared.

Goats were the first animals to be used for milk by humans.

Goats were first brought to America by Columbus in 1493.

Worldwide, more people eat and drink milk from goats than any other animal.

A mature, healthy male buck can breed 20 to 40 does.

The pharaoh Cephranes thought so much of his goats that he had 2,234 buried with him.

Goat’s milk is easily digestible and less allergenic than cow’s milk.

Goat’s milk is higher in calcium, vitamin A and niacin than cow’s milk.

Mahatma Gandhi consumed goat milk every day for more than 30 years.

Goat’s milk is naturally homogenized, and it can be digested in less than 20 minutes where as cow’s milk can take almost all day.

Healthy kids ("kids" are baby goats) can stand within minutes after birth and are able to move with the herd almost immediately.

Goats do not have tear ducts.

Goats and octopus’ pupils of their eyes are rectangular.

Coffee was first discovered when goat herders noticed the animals acting very energetic after nibbling on coffee beans.

Abraham Lincoln’s sons had two goats that lived in the White House with them.


I made mashed potatoes for Thanksgiving (who didn't?). To me, it always seems like mashed potatoes are a blank canvas. There are so many ways to get creative with them because the taste is so mild that they sort of take on the flavor that you add to them. In the past, I have made garlic mashed potatoes, rosemary potatoes, mustard potatoes and cheddar and bacon baked potatoes all of which are easy and delicious. However, this year was the year of the goat cheese mashed potatoes.

How About Them Goat Cheese Mashed Potatoes:

(makes 6 servings)

2 lbs of potatoes (any kind you like)*
Salt (to taste...don't be shy about it)
3 tbsp butter
6 oz goat cheese (use more of less depending on preference)
1 C milk
1 tsp black pepper
fresh chopped chives (to sprinkle over top)

*If you do not want the skin and you plan to peel the potatoes, use large potatoes and cube them before boiling. I use the small red potatoes, boil them whole and mash them with the skin still on...I like the skin)

Boil the potatoes in a large pot, adding a few pinches of salt to the water.
Once the potatoes are fork-tender, drain the water from the pot.
Allow the potatoes to cool for a couple minutes.
Add the butter and salt (to taste) and mash the potatoes with a potato masher.
After you have mashed them almost all the way, add the milk, goat cheese and black pepper.
Continue mashing until the potatoes have reached the consistency you prefer.
Sprinkle the chives on top just before serving.


Note: Definitely taste the potatoes as you add the ingredients because you will likely find you would like to add more of something. I almost always end up adding more salt and goat cheese.

Pictures of goats are from PublicDomainPictures.net.

Friday, November 6, 2009

PotatoE


June 15th, 1992 was officially the worst day of former Vice President Dan Quayle's life. In a single day, he destroyed whatever he had managed to build of a political career. I don't think I can tell of the events of the day better than the following excerpt from this article:


In [his] book, Quayle said he knew little about his next stop, in Trenton, other than it was to help spotlight the city’s Weed and Seed program, which still provides anti-drug education to grade schoolers while they also are being watched by adults until their parents get home from work.

When he got the Munoz Rivera School, Quayle spoke with some women involved in the program, saw a drill team perform and looked in on some self-esteem classes before his aides started hustling him off to another classroom for a staged spelling bee.

"What are we supposed to do?’’ I asked Keith Nahigian, the advance man who had prepared this little photo op,’’ Quayle wrote.

"Just sit there and read these words off some flash cards, and the kids will go up and spell them at the blackboard,’’ the handler told the VP.

"Has anyone checked the card?’’ another aide asked.

"Oh, yeah,’’ responded Nahigian. "We looked at them and they’re just very simple words. No big deal.’’

Enter William Figueroa, 12, a sixth-grader from the Mott School in the South Ward who had been bused to Munoz Rivera to take part in the vice presidential event.

Figueroa knew how to spell potato, and he wrote it in a legible script on the blackboard when Quayle announced his word for the spelling bee.

Quayle looked at the blackboard, then at his contest card, and gently and quietly told the boy, "You’re close, but you left a little something off. The e on the end.

"So William, against his better judgment and trying to be polite, added an e’’ and won applause for it from those assembled in the classroom, including Mayor Doug Palmer, Quayle wrote.

The misspelling wasn’t mentioned until the end of the press conference afterward, when one reporter asked Quayle, "How do you spell potato?’’

"I gave him a puzzled look, and then the press started laughing. It wasn’t until that moment that I realized anything was wrong,’’ Quayle wrote.

"None of the staff people had told me. Caught off guard, I just rattled on a little to fill the air — something about how I wasn’t going to get into spelling matters — but I knew something was really amiss.’’


Imagine. IMAGINE. Something so seemly small exposed this man in such a big way. This story is sad on many levels:

Level #1: The VP of the United States could not spell the word potato.

Level #2: I am pretty sure I learned the "no E at the end of the word potato" rule because of this incident (even though I was only recently reminded of it).

Level #3: According to the rest of that article, the boy who did know how to spell "potato" ended up as a high school dropout and fathered a child by age 17.

Level #4: Dan Quayle took the rap for everyone really. Although he should have known better, the word was misspelled on a card the school had provided him. It doesn't really seem all that fair. Someone prone to explain stories like this by way of conspiracy may wonder if someone misspelled the word on the card on purpose to see if they could cause the blunder.

Level #5: If it were not for spell check, this blog post may suffer from several more misspelled words (because I know there are some that fall through the cracks). Then again, one could argue it is in fact spell check itself that leads to students not learning how to spell properly in the first place. Some simple words I will bashfully admit to consistently spelling incorrectly include: sandwHich and refriDgerator.

Level #6: Dan Quayle cannot use the spell-check-leads-to-students-not-learning-to-spell-properly excuse.

You know what goes better with a potato than the letter "E"? Mustard.


I know it sounds strange, but my trusty friend over at the Smitten Kitchen food blog said it would be great, and it is. When I made these potatoes, Zach actually commented on them before I asked him how they were. They are easy, flavorful and go well with steak and red wine.


Dan Quayle Roasted Mustard Potatoes

(adapted from Smitten Kitchen - serves 4)

Cooking spray
1/2 C whole grain Dijon Mustard
1 tbsp Olive Oil
1 tbsp lemon juice
2 tbsp minced garlic
1/2 tbsp dried oregano
3/4 tbsp kosher salt
1 1/2 lbs small potatoes, quartered or halved (depending on the size) into about 3/4 inch wedges (use any variety you like or mix a few different types)
Fresh ground black pepper

Preheat to 425°F. Spray cooking spray onto a large baking sheet. Whisk mustard, olive oil, lemon juice, garlic, oregano and salt in a large bowl until blended. Add potatoes; black pepper and toss until the potatoes are completely coated. Spread potatoes in single layer on the baking sheet.
Roast potatoes 20 minutes. Remove from oven to flip them. Roast them for another 20 to 25 minutes until the potatoes are crusty on the outside and soft on the inside (about 40 to 45 minutes in all).

Friday, October 9, 2009

Meet Pork

Blog reader, meet pork.


For some reason, the pork PR people never really got it off the ground they way they should have been able to. Maybe it is because little piglets are cuter than cows and chickens and especially fish (even otherwise vegetarians will eat fish they can be so ugly). Obviously, certain types of pork are more popular than others. The following include the types of pork I usually like best and how I prefer to eat it:

Bacon: thin and crisp or wrapped around shrimp.
Hot dogs: mustard only on a bun
BBQ – pulled and slathered in sweet sauce…no need for buns.
Roasted whole – the way my aunt Janet does for Christmas every year.

Something I never really considered was pork tenderloin. The meat is so versatile; I almost forgot that a nice slab of it could be delicious roasted with just salt and pepper. I am also getting very comfortable with the idea of what I have started referring to as “one pan wonders”. This delightful concept was introduced to me when I made the Mediterranean white fish recipe last summer. The entire meal went into the oven on one baking dish. This not only makes for easy meals, but it also seems to help with flavor (especially with the fish recipe).

Ever since I started this blog, I pay more attention to the meals people prepare for me. Every meal is a potential posting. Friends and family members have passed along recipes for me to try, and I am loving it. I have more recipes on my list to get to than I would ever have time to write about, but every once in a while I try something that I feel I must go for. I wanted to try this meal after Zach’s mom made it for us one night. It comes from a recipe given to her by her friend, Mrs. Gill. Although there is still one degree of separation between Mrs. Gill and me, there is now no separation between me and her one dish wonder pork tenderloin recipe. This particular recipe appealed to me because it is surprisingly easy. I use the word “surprisingly” here because you would never know how simple this is by tasting it.


This is so simple that Zach did the bulk of the work. This is less of a slam on his cooking skills and more of a way of saying he does not particularly enjoy being in the kitchen before the food is ready to eat. He is usually willing to help and always takes the reigns over the grill, but rarely do I ask him to prepare 85% of the meal all by himself. I was stuck in the office pretty late, and we were both hungry. By the time I got into the kitchen, there was little left to do. The result was a delicious and satisfying pork tenderloin dinner for 6 (or for 2 hungry 20-somethings for a few nights in a row).

Remember Pork Tenderloin (and other goodies)

(a recipe by Mrs. Gill)

2 pork tenderloins
1 1/2 lbs potatoes of your choice, cut in chunky bites
1 bunch of asparagus spears, ends removed
Salt
Pepper
Garlic Powder
Lipton Onion Soup Mix
Olive Oil

Preheat oven to 400 degrees.
Cut up potatoes.
Put them in a microwave safe container and microwave them until just softening (maybe 4 minutes).
While they are cooking, clean and dry off tenderloins.
Place tenderloins on a oiled broiler pan.
Salt and pepper tenderloins and sprinkle them with garlic powder.
Mix the microwaved potatoes with a drizzle of olive oil and toss them with the Onion Soup mix.
Place the potatoes on the broiler pan with the tenderloins and place in oven.
Let them roast for 25 mins.
Place asparagus on roasting pan after 25 minutes and drizzle with Olive Oil and salt and pepper to taste (I used kosher salt).
Continue roasting for 10 more minutes.

Monday, August 3, 2009

Under the Sea

Have I ever mentioned my baton-twirling days? Maybe I have not because they lasted about a minute, and I do not mean a minute; I mean a minute. I was in the third grade, and my best friend Michelle and I decided it would be a great idea to twirl some batons to the song, "Under the Sea" from the Disney movie, The Little Mermaid for the elementary school talent show. We literally knew how to do the following:

*twirl the baton vertically
*twirl the baton horizontally
*pass the baton in a figure eight motion between my legs

If it is hard to imagine the combination of the above three "tricks" being entertaining for the length of an entire song, that is probably because it would never have been considered entertaining by any stretch of the imagination ....at the time at least.

A video of this exists. I believe it is in the form of a VHS tape in my friend Meagan's collection of insanely horrible and embarrassing videos from our childhoods. It is probably somewhere between the 4th grade solo I sang in a jean jumper of "The Wind Beneath My Wings" by Bette Midler and the lip sync I did with some gal pals of "Say You'll Be There" by the Spice Girls in 6th Grade (I was Scary Spice).

I don't know if my struggle with enjoying seafood began with the great "Under the Sea" fiasco of 1994 or not, but for as long as I can remember I have never been a fan. While I would enjoy the occasional fish stick, I never grew up liking salmon, shrimp, scallops, trout, sea bass, crab, lobster...none of it. I am just now beginning to slowly explore the world under the surface of the sea. Here is where I am at:

Shrimp ...yes please
Salmon ...eh, no thanks
Sea bass ...wonderful
Tuna ...never!
Scallops ...okay
Crab ...sometimes
Crab Cakes ...of course!
Sushi ...yes please
Tilapia ...okay
Calamari ...eh
Halibut...YES YES YES (thanks to the recipe below)

Under the Mediterranean Sea:

(recipe from one of my favorite food blogs, Everybody Likes Sandwiches)

2 large potatoes, scrubbed and cubed
1 small onion, quartered
4 cherry tomatoes, cut in half
1 t dried rosemary (plus additional sprinkle for fish)
2 T olive oil
1 t coarse salt
pepper to taste
1/4 c green olives
1 T capers
2 filets of fish (I used halibut)
juice of half a lemon

Heat oven to 400 degrees. In a foil-lined walled cookie sheet, evenly line the pan with the cubed potatoes and large onion chunks. Drizzle with half of the olive oil, rosemary, salt and pepper and toss everything around with your hands to coat. Bake in oven for about 25 minutes until starting to brown.


On a plate, season the fish and the cherry tomatoes with salt and pepper and a bit of rosemary and coat with the remaining olive oil. Use your hands to make sure everything is covered with the oil and spice.


Push the potatoes to one side of the cookie sheet and place the fish and the tomatoes on the other side. Fill in remaining gaps with olives and capers. Squeeze lemon juice onto the fish and tomatoes.


Return tray to oven for another 20 minutes or so, until fish is cooked and tomatoes are roasted and wrinkled. Transfer onto plates and serve.