Monday, August 23, 2010

A Classy Twist on the Classic - Grilled Cheese and Gazpacho


Things I learned this weekend:

*To surf …well almost…we will try again next weekend
*Standing under a freezing waterfall makes me feel very alive...and scream like a girl
*I like the vibe and the food at The Six
*The Switch was a much better movie than I expected
*Stanley really likes to Skype
*Not to fan yourself when you are pretending to be surprised
*My nieces are cuter every time I see them
*The only thing better than grilled cheese with warm tomato soup is grilled cheese with gazpacho (cold tomato soup).


Zach, Becky and I had a little family dinner last night and enjoyed some cold gazpacho, Spanish wine, mixed greens with balsamic apples and shallots, crusty grilled cheese with goat cheese and manchego cheese, york peppermint patties and good conversation! The gazpacho recipe is from the French Laundry Cookbook. The French Laundry is one of the nicest restaurants in California, located in the Napa Valley. They serve a nine-course menu full of quality small plates that are usually quite intriguing sounding. I have never been, but I hope to go someday. So for now, I just have to settle with recreating their recipes at home.

Gazpacho is a Spanish cold tomato soup that can be served chunky or smooth. I plan on trying it both ways, but this one was smooth. The French Laundry recipe includes a balsamic vinegar reduction on top, but I left it out of mine (I will still include it in the recipe though). My grilled cheese was simple yet very flavorful. Enjoy!


Gazpacho
(recipe from 'The French Laundry Cookbook' - serves 6)

1 cup chopped red onions
1 cup chopped green bell pepper
1 cup chopped English cucumber
1 cup chopped and peeled tomatoes
1 1/2 teaspoons chopped garlic
1 1/2 teaspoons kosher salt
1/4 teaspoon cayenne
1/4 cup tomato paste
1 tablespoon white wine vinegar
1/4 cup plus 2 tablespoons extra virgin olive oil
1 tablespoon fresh lemon juice
3 cups tomato juice
Sprig of thyme
Balsamic Glaze (see below)

Mix all the ingredients except the balsamic glaze together in a bowl or other container, cover, and let sit in the refrigerator overnight.
The next day, remove the thyme and blend all the ingredients in a blender until the gazpacho is smooth. You will have about 2 quarts. For a smoother texture, strain the soup to yield about 1 quart. Refrigerate the gazpacho until ready to serve.

To complete: Ladle the cold soup into bowls and squeeze dots of balsamic glaze over the top.

NOTE: Thomas Keller of French Laundry recommends using either Welch's or Fresh Samantha's tomato juice...the quality of the tomato juice is very important to the recipe.

Balsamic Glaze

2 cups balsamic vinegar

Heat the vinegar in a heavy saucepan over medium heat until steam rises from the liquid. Place the saucepan on a heat diffuser and let the liquid reduce very slowly (it shouldn't simmer) for 2 to 3 hours, until it has reduced and thickened to a syrupy glaze. There should be approximately 1/2 cup of glaze. Keep the glaze in a squeeze bottle at room temperature for garnishing: if the glaze is too thick, warm the bottle in hot water to loosen the glaze.


Fabulous Grilled Cheese:

French Bread (I used wheat) - you can sub any artisan bread
Manchego cheese
spreadable goat cheese
EVOO
Kosher salt

I am not including amounts for the ingredients because it will depend on the amount of sandwiches you need to make. If you cannot figure it out, you should stick to the ole white-bread-American-cheese-slices-with-butter kind of grilled cheese (nothing wrong with that).

Split the French bread loaf down the middle, and spread the goat cheese on the inside of both slices of bread.
lay out the manchego cheese slices, and close the sandwich together.
Brush the outside of the sandwich (top and bottom) with the olive oil, and sprinkle with Kosher salt.
Place sandwiches on a sandwich press if you have one. If not, place in a pan over medium heat until the cheese in the middle is gooey. If the bread is toasted, but the cheese is not melting, you can finish the sandwich off by broiling it in the oven to get the cheese melted.

Sunday, August 22, 2010

Chicken Thighs - A Family Recipe Guest Blog by Wendy

Wendy and I had the great pleasure of enjoying a girls' weekend together while she was here. Zach was away at a conference so we pulled out all the stops.


MASSAGES: I was hoping we could treat ourselves to a blissful hour of relaxation and peace. This experience was not as delightful as I would have hoped. My massage was more like a good beating from a middle school bully. I was literally jabbed and slapped around for 60 minutes. It may or may not have been a bad thing for me (maybe it was good for the muscles), but I was really hoping to kick back and relax. That was not this. I think Wendy's experience was a little better than mine so I am glad about that!

DINNER: We dined al fresco at The Waffle, which has been climbing towards the top of list when it comes to oh-so-good-for-the-soul restaurants in Hollywood. They have perfected the waffle fry; step aside Chic-Fil-A.

MOVIE: We strolled across the street to the beautiful, yet still overpriced ($16), Arclight Movie Theater to catch a flick: Sex and the City 2. We were both seeing the movie for the 2nd time. I know the movie has seen its share of bad reviews, but I liked it. It made me laugh and it was fun to look at; basically, it was the movie equivalent of thumbing through a magazine. That is really all I can ask for when I go see a movie like that, and I was satisfied.

SHOPPING: We made it out to the fabric store Sunday. I am making another apron, and that is all I'll say about that for now!

LUNCH: "California Chicken Cafe is now open on Sundays at their Venice location," is all you hear when you are on hold to order take out from there (something I too often find myself doing). I think I have gushed about this place before, but in case you missed it...yummmmmmm. We dipped on over to them to enjoy a healthy bite.

MORE SHOPPING: Groceries, that is. I realize none of this shopping is the "girls' weekend" kind of shopping you may be thinking, but we managed to have a good time.

COOKING: We decided to prepare a dish that I have had the pleasure of enjoying when I have visited Zach and Wendy's home in Orlando. It is a recipe that has been in their family for years, and I can see why. It is completely satisfying and delicious. Wendy said, "it is like comfort food." That could not be more true about these chicken thighs. She showed me exactly how to make them. They came out perfectly. I will let her share the recipe with you herself.


But first...a couple things you should know about Wendy:

She is a really amazing musician. She is a girl-and-a-guitar kind of gal. We have been lucky enough to hear some of her original music.

She is really good at calming people down. She welcomes the challenge of dealing with angry guests at her job (yes, the kind of people most employees run away from). This is a skill of hers I truly admire because it is something I cannot even begin to imagine being good at.

She has an adorable hamster named Athena. Athena apparently has quite the personality as far is a hamster is concerned. She is a brave lil' lady, rolling right up to Wendy's parents' Boston Terries (within the protection of her plastic ball, of course).

She has a really sweet quality about her that can put you at ease. She is a really great listener and the kind of friend you want to have on your side.

She eats pop tarts for dessert sometimes.


And now for what you've been waiting for...Here's Wendy:

One of my fondest childhood memories is a dish that my grandmother use to make for
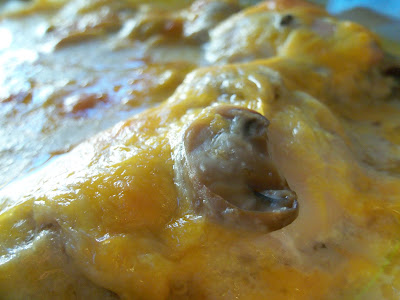
all of us when we would go and visit her in South Florida. It was simply known as chicken thighs which was enough information for me to automatically love them. It was a standard dish for her to make them and I think back at how filling they would be on those “cold” Florida nights. What it consisted of was cream of mushroom soup, cheddar cheese, a pinch of Parmesan cheese, can of mushrooms, and of course chicken thighs. It was best served with rice and green beans.

This tradition of making this dish has carried on into my mom’s hat of things to make. She makes it every once in awhile knowing that it is one of my favorite things to eat. This dish has now been passed down to me and I make it every once in awhile at my college apartment thrilling my roommates for chances to have some leftovers of this great meal. I always have plenty to share with them so they can have a taste of my home style cooking.

I had the opportunity to introduce this dish to Lindsey while I was having a lovely stay in California for the summer. We were in the grocery store one afternoon in the midst of a girls weekend when we were trying to decide what to make for dinner that night. I then suggested that we make my grandmother’s chicken thighs given that I knew how to make them. So we put on our thinking caps as I tried to remember what exactly went into them. After gathering all that was needed we headed to the check out loot in tow ready to start the makings of this dish.

To make this it is rather simple you just have to find a bowl to mix the cream of mushroom soup with the Parmesan cheese a little cheddar and of course more mushrooms!
Then you spread this mixture on top of the chicken thighs and top it with a lot of cheddar cheese. You cook it for about an hour and a half at 350 degrees F then it should be ready to eat.

This is a nice comfort food that has been in my family for many years. I hope to one day pass this down to my kids and hopefully it will go on for there. It was fun being able to share this with a close friend!


6-8 chicken thighs (bone-in - skin removed)
1 can cream of mushroom soup
generous pinch of Parmesan cheese
2 C shredded cheddar cheese
1 can or jar of mushrooms

Preheat oven to 350 degrees F.
In a large bowl, mix the cream of mushroom soup, Parmesan cheese, 1/2 C of the cheddar cheese and the jar/can of mushrooms.
Place the chicken thighs in a large casserole dish.
Pour the mixture over the chicken thighs.
Sprinkle the remaining cheese over the top of the mixture evenly.
Bake at 350 degrees F for 90 minutes.

UPDATE: Don't forget to remove the skin from the chicken thighs first!


Serve over rice with some green veggies and be happy!

Friday, August 20, 2010

Catch Me on the TV Box Tomorrow

The time has come!


This Saturday is the day to catch me in my room makeover episode of "Character Fantasy." The show airs during the commercial breaks of a movie, Bring It On Again at 10:00AM PDT on the USA Network. See you tomorrow!

Oh, also the time has come for the peach tree to stop producing so much fruit. That means peaches for everyone I see for the next few days! Can't let them go to waste :]


Come and gett'em!

Tuesday, August 17, 2010

Bragging Rights - Bourbon Peach Cobbler

"The world’s largest peach cobbler is made every year at the Georgia Peach Festival, measuring 11 by 5 feet.


This is not that cobbler.

In an attempt to bring you more peach tree recipes. I decided to try out something I snipped from (yet again) my food network magazine before my peach tree was even in full bloom. The fact that the recipe calls for 8 peaches caught my eye because I am trying to not let these darlings go to waste! Amazingly enough, I had all the ingredients for this recipe already in my apartment except for the heavy cream so I was good to go.

I was reading up about peaches and cobblers and came across the website for the Georgia Peach Festival where they make the biggest peach cobbler in the world each year.

The colossal cobbler -- 11 by 5 feet and about eight inches deep -- is made from an extraordinary 90 pounds of butter, 150 pounds of sugar, 150 pounds of flour, 32 gallons of milk and, of course, 75 gallons of peaches.


They also apparently use trash cans as bowls and boat paddles as mixers. Why do people do this? It reminds me of this battle I heard about on the radio between Lebanon and Israel...no not an actual battle...but a culinary battle: the world's largest bowl of hummus. The countries have been going back and forth (3 times just in the past year) making the world's largest bowl of hummus, each time topping the other country's record. Lebanon won the most recent title with a bowl that weighed 23,042 pounds in May 2010. The competition goes deeper than just making a huge bowl of the yummy stuff. The countries have long feuded over where the traditional chickpea-based dip originated. Since that argument cannot be proven one way or another, this is a way to give the country's something tangible earn bragging rights to.


I may have set the record for the smallest peach cobbler as I did not want to make too much. I don't have too many mouths to feed, and my personal mouth does not need to be chowing down on peach cobbler all week. I just had to try this recipe, and I am really glad I did. This actually got two "that was really good" comments from Zach...one during consumption and one later, much later (I think the later after a meal a good comment about the food is made, the better)! That is about I all I need to claim bragging right in this blog. The topping is delicious and not too sweet. The bourbon adds a nice rich flavor to the peaches. The peaches from my tree have a slightly tart flavor which actually worked pretty well for this. I cannot say enough. Just try it.


Bourbon Peach Tree Cobbler
(recipe by Tyler Florence in Food Network Magazine
)


8 peaches, peeled and sliced
1/4 C bourbon
3/4 C sugar, divided, (plus extra for sprinkling)
2 tbsp cornstarch
1 tsp ground cinnamon
1 1/2 C all-purpose flour
2 tsp baking powder
1/2 tsp kosher salt
1 1/2 sticks (12 tbsp) cold unsalted butter, (extra 2 tbsp for skillet)
3/4 C Heavy cream (plus extra for brushing)

Heat the oven to 375 degrees F.

In a large bowl add the peaches, bourbon, 1/4 cup sugar, cornstarch, and cinnamon and mix well to coat the peaches evenly; set aside.

Prepare the dumplings: Into food processor (or by hand) add the flour, 1/2 cup sugar, baking powder, and salt. Cut 12 tablespoons (1 1/2 sticks) butter into small pieces. Add it to the flour mixture and pulse until the mixture looks like wet sand. Mix just until the dough comes together. Don't overwork; the dough should be slightly sticky but manageable.

In a 10-inch cast iron skillet over medium-low heat, melt the remaining 2 tablespoons butter. Add the peaches and cook gently until heated through, about 5 minutes. Drop the dough by tablespoonfuls over the warm peaches. There can be gaps, the dough will puff up and spread out as it bakes. Brush the top with some heavy cream and sprinkle with some sugar; put it into the oven on a baking sheet to catch any drips. Cook for 40 to 45 minutes until the top is browned and the fruit is bubbling.

Thursday, August 12, 2010

Getting Crafty

I like to be crafty...


...not in a sly or cunning way, but in an "I-like-to-make-crafts kind" of way. When I was in high school, I used to be obsessed with taking pictures at every gathering or event. I was convinced that it was my job to collect and organize the memories for everyone. I would do things like take pictures of other people in my class that I didn't even know just to preserve special moments, even if they weren't mine. I made a huge (and I mean busting-at-the-binding) scrap book for each year of high school. These scrap books are the most intense scrap book any high school student has ever made or ever will make in the history of scrap-booking. I challenge anyone to prove my wrong.

These babies are packed full of not only pictures, but ticket stubs, notes, sections of notes, programs, newspaper clippings, restaurant menus, yarn (long story), laminated badges, leaves, flowers and just about anything that would remotely fit between the pages of my books. I spent so many hours of my life over the course of each year collecting and putting together these books. I would sprawl out on the living room floor with my scissors, tape, boxes of pictures/papers and decorating materials and go to work. I would usually have some TBS weekend movie or a Survivor marathon on as I worked. I wouldn't move for hours from that spot; my legs would ache from sitting on the floor for so long. I was just so dedicated. I wish I had them to show you because I would say in a second those albums are worth every second I spent working on them. I not only have such great memories from my high school days, but I can also so easily access those memories by flipping through the pages of those books.

I just love diving into a new craft. I don't do things half-way either. I don't see a huge project as daunting by any means; it is a time to make use of my hands while I watch TV (I consider watching TV studying for me since I am working in the entertainment industry). I have mentioned before that I have started making aprons, a task that has been made much easier since acquiring a classic sewing machine from Zach's mom a few months ago. I even made curtains for my bedroom makeover (which will air on the USA Network's Character Fantasy August 21st - I will keep you posted!). I even had someone buy one of my fancy (or at least I try to be fancy) aprons!


Basically, I always have to have a crafty project going on in my life. I just completed (but am always adding to) my latest venture: a recipe/idea book.

The timeline for how this book came about goes like this:
1. I started to go to the gym regularly
2. I quickly became bored on the cardio machines, and started reading magazines...lots of magazines.
3. I started cooking (and this cooking blog) to save money and help stay healthy.
4. I started becoming really interested in finding new recipes.
5. I stated plowing through food blogs, all recipes and asking friends/family for good ones.
6. I started buying magazines for their recipes and decorating and travel tips instead of for their celebrity gossip and fashion advice.
7. I had stacks and stacks of papers and full magazines which had recipes I had marked as "something I want to try in the future."
8. I started this binder:


It is broken up into sections which include: appetizers, breads/breakfast, beverages, sweets, sides, chicken, beef, seafood and pasta. The papers/magazine tear-outs are all in plastic page protectors; this is great because I can take the page out and have it right on the counter while cooking without having to worry about the pages getting wet or messy.


I also included some sections for non-recipe related things like restaurants, travel, cooking tips and decorating ideas. I subscribe to 3 different magazines: Food Network, Good Housekeeping and Sunset Magazine (a gift from my dad!). Between those and the extra random ones I buy every now and then, my binder is growing faster than I can cook! For that reason, I throw out any recipes or ideas that I have tried and not liked to make room for the new ones. I can also throw out the full magazines (with my recipes ripped out, of course) without feeling like I should save them for just one article.


I turn to this binder when I need some inspiration. Just the other night I made a new recipe I put in that binder a while back from my Food Network Magazine for Skillet Rosemary Chicken. It was a great, low-maintenance dish that was satisfying. I made the recipe for four and then used the leftover chicken to make my Chicken Pita Salad. Success!


Too Easy Rosemary Skillet Chicken
(recipe from Food Network Magazine (slightly adapted) - makes 4 servings)

1 pound small red-skinned potatoes, halved, or quartered if large
Kosher salt
2 sprigs fresh rosemary, plus 1 tablespoon leaves
1 clove garlic, smashed
Pinch of red pepper flakes
Juice of 2 lemons (squeezed halves reserved)
2 tablespoons extra-virgin olive oil
4 skin-on, bone-in chicken breasts (6 to 8 ounces each)
10 ounces cremini mushrooms, halved
Fresh Ground black pepper

Preheat the oven to 450. Cover the potatoes with cold water in a saucepan and salt the water. Bring to a boil over medium-high heat and cook until tender, about 8 minutes; drain. Sprinkle with kosher salt and some olive oil and set aside.

Pile the rosemary leaves, garlic, 2 teaspoons salt and the red pepper flakes on a cutting board, then mince and mash into a paste using a large knife. Transfer the paste to a bowl. Stir in the juice of 1 lemon and the olive oil. Add the chicken and turn to coat.

Heat a large cast-iron skillet over medium-high heat. Add the chicken, skin-side down, cover and cook until the skin browns, about 5 minutes. Turn the chicken; add the mushrooms and potatoes to the skillet and drizzle with the juice of the remaining lemon. Sprinkle kosher salt and fresh ground black pepper to taste over everything.

Add the rosemary sprigs and the squeezed lemon halves to the skillet; transfer to the oven and roast, uncovered, until the chicken is cooked through and the skin is crisp, 20 to 25 minutes.

Wednesday, August 11, 2010

What's a girl to do with leftover BBQ?

I have been eating out a lot lately.


Zach always insists on keeping the left overs, no matter how unlikely it is we will revisit them at a later meal. I know it is unfortunate, but they usually sit in the refrigerator for about two weeks until they get tossed. But really, what use do you have for 1 slice of pizza, 5 chunks of orange chicken, an ounce of steak, a quarter sandwich, a half baked potato and some soggy salad? You can't eat any one of those things as a complete meal, and any combination of that list makes my stomach churn uncomfortably.

Well, last week we visited the undeniably delicious Dr. Hogly Wogly Tyler Texas BBQ with Zach's family. They boast the most generous portions of solid saucy sliced pork plates I have ever seen topped with three crinkle-cut sweet pickles. The meat is just perfect, and the sauce is tastily tangy. Everyone had leftovers that the waitress packed up by throwing the saucy chunks into clear plastic bags with a knot at the top. More on that later.

The rest of Zach's family's visit was so fun. We always look forward to having them come visit. They planned a whole weekend trip to Seal Beach, which is the most adorable little beach town just south of Long Beach. We stayed just a couple blocks from the ocean.


We rode bikes along the coast down to Long Beach, we visited a huge and beautiful antique shop owned by a blogger that Zach's mom has been corresponding with for a while, we took Stanley to a really great dog beach where he ran longer and faster than ever before and oh yes, we ate and ate!


There were so many really cute local restaurants including Rivers End Cafe (which was right on the beach - best fish tacos I have ever had), Park Bench Cafe (this was an adorable little cafe in the middle of a beautiful park with lots of trails around a small pond) and Walt's Wharf (the last supper of the trip - it was really special, and my halibut dish with black rice was something right out of "Top Chef"). Stanley really liked Park Bench Cafe.


The whole town was just bursting with charm. It boasts the second longest wooden pier in California with a Ruby's diner at the end of it. It was so nice just to stand on the pier and watch the fisherman beside us and the surfers below us. Seal Beach is definitely a place we will be returning to in the future.


Now for all those left overs! What's a girl to do? Zach, Wendy and I were preparing for a night in front of the tube to catch up on the first two "Mad Men" episodes of this new season when I said, "tacos or quesadillas?" They said tacos so I made this:


I would not have normally thought to use BBQ pork in a taco with cheese and pico de gallo, but I had had BBQ chicken quesadillas with similar flavor combinations that were the bomb. I guess you could call it a fusion dish because Mexican style BBQ usually has more of a sharp, spicy or even vinegary flavor (barbacoa) where as the BBQ in these tacos was good ole fashion Texas BBQ with a sweet/tangy flavor. I liked mixing the sweet/tangy BBQ with the traditional Mexican flavors of a slightly spicy pico de gallo, jack cheese, corn tortillas, and lime! I am just now kicking myself for skipping the avocado...that might have been pretty good too! In case you are wondering, I picked up those sweet little restaurant style baskets at Jo-Ann Fabrics...who knew?


Leftovers Tacos (with BBQ Pork) - makes 8 tacos

Leftover BBQ (slice pork, pulled pork, brisket, etc) - you can also make your favorite pulled pork recipe, or you can make mine.
8 corn tortillas (6" diameter)
Pico de Gallo, about 2 cups (you can buy it from the store or make your own by dicing 3 ripe tomatoes, 1/2 white onion, 1/4 C fresh cilantro and 2 seeded jalapeno peppers and mixing it all together)
1 C shredded jack cheese
sour cream and avocado (or Guacamole) for dolloping
lime wedges

Place the meat with all the sauce into a large skillet over med-heat
As the meat starts to warm, start to break it all up with a wooden spoon (for tough pieces, you may need to chop it up beforehand).
Once the meat is heated all the way through and broken up, turn off the heat and place the corn tortillas over the pan to catch the steam (you will be layering them on top of each other, but spread them as much as you can.
Build each taco by placing the meat down first, then the cheese and then the pico de gallo.
Top it off with the sour cream or avocado.
Squeeze a lime wedge over it all.

Friday, August 6, 2010

Fast-Peach Softball

Before there was the kitchen, there was the softball field.


I have not been in the position to prove the following statement in quite a while, but I used to be pretty darn athletic. I believe I have my parents to thank for that as they got their workouts back in the day by lugging my brother, myself and our equipment from practice to practice for all kinds of sports. Here is the list of organized sports I at least got to try growing up:

tee-ball
tap dance
ballet
soccer
gymnastics
tennis
baseball
swimming
basketball
volleyball
softball

I even took piano lessons and little acting class too. I know this sounds like a lot, and you may be thinking my parents were nuts, but I didn't play all of these sports all the time. Some were for just for one season (I believe tennis was the shortest for about 4 weeks...I am not good at tennis).

As I got older, I started to focus on the sports at which I really excelled: softball and basketball. I really liked soccer too, but it was during the same season as basketball so it had to go. I played softball on travel-ball teams which are teams you have to try out for that travel around the state for weekend tournaments. Our team was good, but not the best by any means. We all got along really well and had so much fun because we had all played together for a long time. I was the catcher because I could stop the ball from getting past me on wild pitches, and I had a really good arm (to throw people out that were stealing bases). I usually batted 2nd or 5th in the lineup because those were the positions for someone who could usually get on base but was not a power hitter (basically I could do the bare minimum to not get out).

One thing our team was really good at was cheering. I wouldn't expect you to know how important cheering was for a softball team unless you have played the sport on some competitive level. You basically cheer non-stop when you are in the dugout and your team is batting. Cheering would give your team a sense of unity and pride. Complicated, funny or clever cheers were encouraged. It was especially fun when your team had a cheer that no other team knew about because eventually they all started to be the same. Here is an example of a cheer we used to do from the dugout when whoever was up to bat did not swing at a pitch and it was called a strike:

"Nacho nacho pitch... You didn't swing cause it's nacho pitch!"
(this was sung to the tune of "Nacho Man")


Here is another one I remember that could be spouted out at any random time from the dugout. One player would yell out the main lines and then the rest of the team would answer the lines in italics:

"My name is Sammy and I know what I got" (What do you got?)
"I got a team that's hotter than hot" (How hot is hot?)
"Batman and Superman" (We're number 1)
"Can hit the ball like (insert name of the next player who will repeat the cheer) can!"


That cheer would go on and on until every single girl had had her turn to say the main part.

There were cheers for almost every little thing that could possible happen in a game: high pitch, dirt ball, stealing bases, switching out the pitcher, etc.

Only now do I realize how little sense the cheers actually made, but that doesn't mean it was not a blast in the moment!

One of my favorite cheers was short, simple and makes very little sense:

Peaches and Cream, peaches and cream, What's the matter with the other team?
Nothing at all, nothing at all, they just can't play...SOFTBALL!


It is the month of the peach tree, after all. The tree in our backyard area is in full bloom, and I have been stuffing myself with at least a peach a day for the last few weeks. The other night, I made my first peach-centered meal of the season: peaches n' pork. I came across a great website that features free cooking videos online called Food Wishes. The site has a great video on how to make "Roasted Pork with Balsamic Glazed Peaches - a Perfect Pairing". I love the blogger, John's, style. He doesn't measure his ingredients, he provides more convenient options that do not necessarily compromise the taste of the final dish and he is really easy to follow. I made this meal to celebrate the summer Wendy spent in Los Angeles since it is one of her last nights before going back to Florida.

Here is a picture of one of the plates just before Stanley came and swiped a slice of pork right off the plate!


In honor of him, I have made up my own cheer for this meal:
Peaches and pork, peaches and pork, you better get ready and get out your fork.
Don't wait too late, don't wait to late, or Stanley will come swipe it right from your plate!


Oh, you can see, he is very pleased with himself...


Balsamic Peaches and Pork Tenderloin
(serves 4 - recipe from Food Wishes: follow the video here (it will be easier than understanding my directions I am sure)

1 1/2 whole pork tenderloin (you will probably be buying two "logs")
4 fresh rosemary sprigs
Fresh ground black pepper and salt to taste
4 fresh peaches (cut into quarters)
2 tbsp butter
2 tbsp balsamic vinegar
1 clove fresh garlic
Olive oil
Mixed greens
2 tbsp blue cheese crumbles (optional for mixed greens)
Thinly slices red onion (optional for mixed greens)
Thin apple slices (optional for mixed greens)
A slices French baguette

Separate the rosemary sprigs from the stem, and beat them moderately with the dull end of a knife (John calls this "Bruising" the rosemary...it is to bring out the aroma and flavor).
Season the pork with the black pepper and rosemary leaves, and place them in a ziploc bag for a couple hours (if you do not have time for that, just do it for a short time).

In the meantime, melt 1 tbsp of butter in a large pan over high heat.
Put the peaches in the pan, flesh side down, and turn the heat down to medium.
After about 2-3 minutes when the peaches start to brown, flip them to the other flesh side, and do the same.
Now flip them on the skin side for another minute, and then turn off the heat.
Add the balsamic vinegar, and mix around (it should thicken and reduce a little after a minute or two.
Transfer the peaches to a bowl, and set aside.

Preheat the oven to 375 degrees F.
Prepare the pork by removing the rosemary leaves from it, and discard. Then salt the meat.
In a large, oven safe, pan, brown the meat on the stovetop on all sides by placing on the hot pan for 2 minutes, flipping and doing the same on the other side...do not move the meat around during the browning...it will form a nice brown crust this way)
Place the pan with the pork into the oven for 20 minutes.

When the pork is finished cooking, let it rest for 5 minutes.
Sprinkle some mashed up garlic bits into the hot pan (where the pork was). Then pour a little bit of water and balsamic vinegar into the pan and mix around (bringing up the bits stuck tot he pan), bringing the stovetop to medium heat.
After a couple minutes, turn the heat off, and add a tbsp of cold butter to the juice. Mix constantly until butter is melted.

Place the Baguette slices in the hot oven to toast while you toss the greens in just a little bit of equal parts olive oil and balsamic vinegar and the blue cheese crumbles (and apple and onion if using).

Slice the pork at a slight angle, and plate it up with the peaches over the greens and the pan juice poured over the meat.

Monday, August 2, 2010

Summer Salad for the Vacationeer (with homemade croutons)

Everyone is on vacation except for me.


When you live in (no-place-in-the-world-better-than-this-weather) Southern California, you get a lot of visitors. Now, summer used to mean time off and vacations and overnight beach trips...maybe a study abroad thrown in there. As a young adult, I find myself in this odd stage of life where I am too old for the kind of "school's out for the summer" vacation you experience growing up, but I am too young (i.e. too early in my career) to afford the luxury of leisurely travel or even time off from work. It is a huge bummer, but Zach and I make the best of it by taking mini-trips for weekends or even just day trips here and there since there are so many great places to visit nearby.

All of this time spent locally doesn't mean I have to miss out on being a part of others' vacation travels. Every summer since I have lived in Los Angeles, I have been fortunate enough to host some of my favorite people in the world when they get some time off to travel. I absolutely love when friends and family come to visit. It is something I always look forward to, and it usually happens in the summer.

Let's see, last weekend it was Becky, Joanie and Amanda. After the shopping of the wedding dress festivities were concluded, Becky, Joanie and I floated off into the fantasy world that is Laguna Cliff's Marriott Resort and Spa in Dana Point.


I have never been more in the lap of luxury than the moment the nice pool people came by to ask if I needed my sunglasses wiped and a slice of pineapple. Our views from the balcony of our room were not too shabby either.


This past weekend, it was Zach's family who graced us with their presence. They were just happy to be out of the Florida heat/humidity they have been experiencing. We were all over the city, enjoying the beautiful sunshine and breeze. We visited the dog park, some fantastic restaurants, the Melrose trading post (a personal favorite) and the beach!


His mom took this really sweet picture of us walking ahead (for more on their trip, visit Zach's mom's blog, The Boston Lady.)

We will also be spending next weekend with them at the beach about an hour south of LA...Seal Beach. We have never been so that will be another exciting weekend trip we will get to experience.

Last night, we decided to take a more mellow approach to the LA dining experience. Zach's parents brought over some delicious pizzas from the Village Pizzeria on Larchmont. We popped open some wine (along with some Ed Hardy Sangria), and I made a fantastic tomato and bread salad. I am not trying to toot my own horn... I just need you to understand that it really was great.


I haven't been doing so well with cooking consistently recently, but making this fresh and flavorful salad inspired me to kick it back up! I adapted it from a recipe I saw in Woman's Day Magazine . I took the magazine's recipe for an heirloom tomato salad with garlic bread and turned it into the hotest summer dish around, Panzanella. Panzanella is an Italian bread and tomato salad (think: bruschetta in a bowl). I wanted to keep it lighter on the bread and full of fresh tomatoes and bold flavor. I will say the bread really does pull everything together and serves to absorb all the flavorful juices. Zach commented that it had all the great things about salad without the useless "filler" (i.e. lettuce). Now, I am a fan of lettuce, but this salad doesn't need it!


Summer Vacation Perfect Panzanella (with homemade croutons)
(adapted from a recipe in Woman's Day Magazine - serves 6)

WARNING: These instructions are long, but they are very simple. The whole thing should take no more than 20 minutes!

For Homemade Croutons:
1 thin French Baguette (should be thin, about 3 inches in diameter, and have a course/crunchy crust - do not use soft bread)
4 large garlic cloves
1/4 C extra virgin olive oil (you may need to add more)
kosher salt
freshly ground black pepper

For Salad:
1 medium red onion, very thinly sliced, separated into rings
4 oz feta cheese, crumbled
3 lb mixed heirloom tomatoes, cut into chunks (I did not have heirlooms at my grocery store - I used a couple different varieties of really ripe tomatoes)
1/3 c of kalamata olives (they come in a jar, not a can like regular black olives)
1 yellow bell pepper, chopped into chunks
1⁄4 cup white balsamic vinegar (I could not find white balsamic so I used regular red balsamic; The taste is similar, but the white is more aesthetically pleasing)
1⁄4 cup plus 1⁄2 tsp extra-virgin olive oil
1⁄4 tsp each salt and freshly ground pepper
1⁄2 cup torn fresh basil leaves
homemade croutons (from one thin French Baguette)

Start by making the Croutons:
Preheat the oven to 400 degrees F.
Cut the baguette down the middle long-ways.
Smash up the garlic, and rub it all over the bread on the inside and out, leaving bits and pieces on the bread (reserve any extra bits).
Cut the bread into cubes (The best way I have found to do this is to fold up the two long slices back on top of each other, then cut longways into three sections, basically making 6 long strips. Then cut across in 1 inch sections all the way down the strips to make cubes.)
In a large bowl, toss the bread cubes with olive oil (and all remaining garlic bits). Continue adding the oil and tossing little by little until all the croutons are lightly coated.
Toss in some kosher salt and freshly ground black pepper to taste.
Spread cubes out on some aluminum foil (I didn't even use a baking sheet).
Place the foil with the cubes into the oven, and bake for about 10 minutes.
You will have to watch them closely. They should start to turn golden and have a crunch on the outside but still remain ever so slightly soft on the inside (that is how I like them at least...you can leave them in for longer if you like them crunch throughout).

For the salad:
Place the onions, croutons, tomatoes, basil and yellow bell pepper in a large salad bowl.
Add the vinegar and oil, and toss.
Add the feta cheese, olives, salt and pepper on top and toss again.
Put the bowl in the refrigerator for about 30 minutes before serving to allow the flavors to meld.

Sunday, August 1, 2010

Say Yes to the Dress..Not the Mess - couple's cooking class part 1

The wedding adventures continue...


My dear friends from Florida, Amanda, Becky and Joanie were in Los Angeles last weekend. We had a grand ole' time galavanting about the city (and outside of it). We did something very important together, something I have never done before (even though I have already been in several weddings): tried on dresses. Let me clarify; Amanda tried on dresses.


No, that was not "the one." If you know Amanda, you can imagine that she was ultra low maintenance during this process. She basically found her wedding dress in about 4 hours. It was the last one she tried on for the day, and we all saw that it was going to be a winner before she even took it off the hanger. I cannot reveal too much, but it is just gorgeous on her. In case you are picturing a moment straight out of "Say Yes to the Dress" where the girl and her mother are crying and she is saying over and over again "I feel like a princess. I feel like a princess," I will tell you right now it was not like that....thank God. It was exciting, no doubt, and we had so much fun watching her try on all those dresses. At the end of the day, it is the incredibly strong 10-year relationship she has had with her fiance that is the most exciting part of it all. Well, there is also the idea of her having a hyphenated last name of "Johnson-Thompson" that makes me really happy as well.

I would like to raise a toast to the bride and groom to be...


May your marriage be as delightful and breezy as finding a beautiful wedding dress.

Speaking of romantic partnerships...my romantic partner (aka Zach) treated me to the best birthday present I have ever received a few weeks ago. Now, my birthday was back in May, but we were just recently able to go to the COUPLES COOKING CLASS he booked for me as a wonderful gift. I am going to be posting some of the wonderful recipes from Chef Eric (the great instructor) that night on my blog so I will talk more about the class itself later. I have been a terrible food blogger recently because I have had a cooking dry spell. Tweaking my salad order at California Chicken Cafe has been the extent of my use of any culinary skills I may still be holding on to. I will be hitting the ground running again in the next couple weeks. However, until then, I will continue sharing the recipes that we made in the classroom (under strict guidance!).


Grilled Polenta (Couples Cooking Class Part 1)

(recipe by Chef Eric at the Culinary Classroom)

4 cups chicken stock
2 oz (1/2 stick) butter
1 1/2 tsp salt
1 C polenta (cornmeal)
3/4 C parmesan cheese

Preheat oven to 325 deg F
Combine chicken stock, butter and salt in a pot and bring just to a boil.
Add the polenta in a steady stream, stirring constantly to avoiding lumps.
Bring the mixture to a boil.
Cover the pot and place in the oven for 20-25 minutes.
While baking, line a baking sheet with parchment paper and lightly grease he paper.
When finished baking, remove the pot from the oven, and mix in the parmesan cheese.
Spread the polenta onto the baking sheet and smooth with spatula. Let cool, then refrigerate until firm (about 20 minutes)
Cut polenta into desired shapes.
Lightly dust the shapes with flour (shaking off the excess)
Saute in a small amount of butter or oil until golden and warmed throughout.

Note: Chef Eric suggested skipping the grilling steps if you are counting calories (due to the extra oil and flour). If you want to skip this step, you can serve the polenta right from the pot before cooling, making a bed of it beneath whatever you are serving it in top of (e.g. chicken breast, steak, etc).