Saturday, June 18, 2011

Summer Sides - Shallot/Lemon Brown Rice with Toasted Pine Nuts and Roasted Zaatar Carrots

I have always been all about the sides.


When you have a habit of wanting to taste the food on everyone's plate at the table, side dishes are important to you. They offer variety in a meal. Sure, the hunk of beef, chicken breast or fish maybe are delicious, but the side dishes really bring out the best in the main dish. I always like to have at least two sides, and one of them has to be special.

For this casual Sunday evening dinner, I was making some super easy tilapia with some herbs de provence and lemon rub. I decided to focus on some more adventurous sides. They both were very flavorful and turned out very well. I loved the zaatar carrots because the natural sweetness in the carrots contrasted the tangy kick of the zaatar spices; this made for such an interesting combination. I imagine you could substitute any vegetable for carrots like asparagus, zucchini, potatoes, etc. I also made brown rice with lemon, shallots and toasted pine nuts....yummmm. Yes, it was good.


Zaatar Carrots

(Serves 4, recipe from "Food Network Magazine")

Preheat 2 baking sheets in a 450 degree oven. Quarter 4 pounds carrots lengthwise and toss with 1/4 cup olive oil and 3/4 teaspoon each salt and pepper. Spread on the hot baking sheets and roast until browned, 18 to 20 minutes. Toss with 4 teaspoons za'atar (a spice blend available at Middle Eastern markets), 3 tablespoons chopped parsley and the juice of 1 lemon.


Brown Rice with Lemon, Shallots and Toasted Pine Nuts

(Serves 4, recipe from "For the Love of Cooking")

2 tbsp pine nuts
1/2 tsp olive oil
1 shallot diced finely
1 tsp lemon zest divided in two
Brown rice prepared per instructions (use vegetable or chicken stock to cook the rice - it's much more flavorful). Also, add 1/2 tsp of lemon zest to rice while cooking.
1 tsp butter
Salt and pepper to taste

While the brown rice is cooking, add pine nuts to a DRY skillet over medium heat. Toast the nuts stirring often, until they are golden brown 2-3 minutes. After the nuts are finished cooking, remove from pan and set aside. In the same pan add the olive oil over medium heat. Add the shallot and cook until soft and tender. They cook fast so stir them often. Once rice is finished cooking, add pine nuts, shallots, the remainder of lemon zest, butter and salt and pepper to taste.

Saturday, May 28, 2011

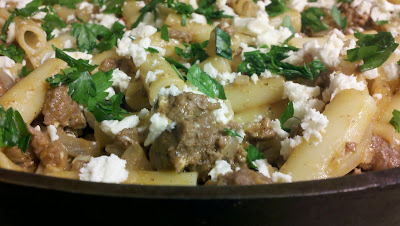
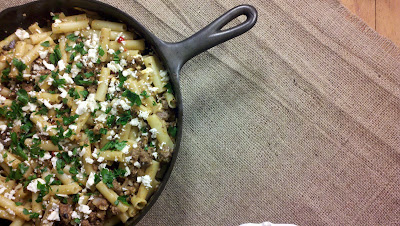
Planning a Wedding and Oh yeah, cooking too - Greek Ziti Ragu

When Zach and I got engaged, I thought I would end up blogging away about the wedding planning process.


I thought food blog readers were a similar target audience so it would be nice to sort things out via this blog, with a recipe to accompany every step of the way. I am now two months in to my 6 month engagement, and I do not think I have really mentioned the crazy world of wedding planning. If this is not something that interests you, forgive me for starting now.

You do not need a lot of time to plan a wedding. In fact, I prefer the condensed process which will all start and end before there is too much time to dwell on all the things I am including and not including in the process. What you do need is a lot of advance notice.

Every vendor, specifically the ceremony and reception venues need to be booked so far ahead time. I found myself running out of options for a reception venue before I even started looking. And the date we picked, the Florida Gator Football bye weekend of October 22nd? Forget it.

We started throwing out alternate dates, pending the availability of the reception spaces we were drawn to. By the time we found the location we ended up booking, there were two dates available within months of our original date: September 18th (a Sunday) and September 11th (a Sunday). For obvious reasons, we went with September 18th.

Our wedding celebration will be at the Winter Park Farmers’ market in Orlando, Florida, a location originally brought up by Zach’s mom (who originated several other successful ideas like the greyhound breed of dog we ended up adopting, my beloved cast iron skillet, my sewing hobby and the easy-peasy crock pot). The place is perfect for us. It is nice enough for an event such as a wedding, but not stuffy or cookie-cutter the way so many reception locations can be. The farmers’ market has loads of character and old-school charm with its red brick structure and hanging bulb lights. It used to be a train station, but has been converted to serve as a venue for weddings and other events as well as a farmers’ market every Saturday. Zach and I are big fans of farmers’ markets in general so it just seems really appropriate that we celebrate or marriage at one.

The ceremony will be at Loch Haven Park which is just behind the Menello Museum of Art, about 10 minutes away from the market. The criteria for a ceremony location for was “a big tree”. I just wanted to get married under a big tree. This is of course, weather permitting which means a lot more in Florida during hurricane season than it would somewhere like California in the fall.

We made a "save the date" movie trailer instead of the traditional save the date postcards. I am posting it below for your viewing pleasure...


I am well beyond the venue booking at this point in the process, but more on that later. For now, I will leave you with THIS:


Greek Ziti Ragu

(a recipe by Rachel Ray - makes 5-6 servings
)

2 tablespoons EVOO (extra-virgin olive oil)
1 1/2 pounds ground lamb (I used beef)
Fine sea salt and black pepper
2 sprigs fresh oregano or marjoram, leaves finely chopped (about 1 tablespoon)
4 cloves garlic, finely chopped 1 onion, finely chopped
1 large fresh bay leaf
1 cinnamon stick
1 small red chile pepper, such as fresno or cherry, finely chopped
About 3 tablespoons tomato paste
A small handful pitted kalamata olives, finely chopped, or 2 tablespoons black olive tapenade
1 cup dry white wine 1 1/2 cups whole milk
A few grates fresh nutmeg
1 pound ziti pasta
1/2 pound brick greek feta cheese, drained and finely crumbled
A handful each flat-leaf parsley and fresh mint, finely chopped

Heat a large dutch oven over high heat. Add the EVOO, 2 turns of the pan, and the lamb; brown the lamb, caramelizing the meat to deep brown. Add lots of black pepper, sea salt, the oregano (or marjoram for a milder taste), garlic, onion, bay leaf, cinnamon stick and chile pepper and cook for 7 to 8 minutes to soften.

Add the tomato paste and olives (or tapenade) and stir for 30 seconds. Add the wine and deglaze the pan; add the milk and reduce the heat to a simmer. Add nutmeg to taste and simmer the ragù while you cook the pasta.

Bring a large pot of water to a boil, salt it, add the pasta and cook until al dente. Drain, reserving 1 cup of the pasta cooking water. Return the pasta to the hot pot with half of the finely crumbled feta. Discard the bay leaf and cinnamon stick. Add the ragù to the ziti and stir, adding in the pasta cooking water as necessary to move the heavy ragù around the pasta. Serve in shallow bowls topped with the remaining feta and the finely chopped parsley and mint.

Sunday, May 15, 2011

Don't You Forget About Me - Brunch Club May

I thought of a new excuse for not posting in a while.


Brunch club nearly disappeared after the last one that was sometime last year! Sue heroically revived it, and the newlyweds, Robily, graciously hosted at their new cool apartment in Pasadena. It was delightful to meet back up again. It had certainly been a while. With the return of brunch club, I am inspired to make a return to blogging after, well let's call it a sabbatical.

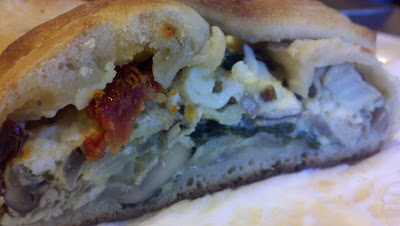
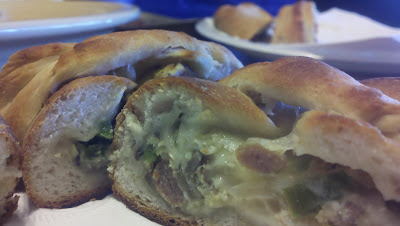
The club-goers (the brunch club goers that is) depend on us to bring the hearty egg-type dishes to the event so I made this little breakfast calzone I have been meaning to try from my recipe binder.

I made two, one with sausage/jack cheese/egg/peppers/onions


...and the other with feta/sun-dried tomato/egg/spinach/mushroom/onion.


The former was from the recipe, the latter was a creation of mine not only to accommodate the vegetarians in the group, but also to experiment with the concept to see if it would work with other ingredients. The feta/spinach one was actually better in my opinion.

It is almost unnecessary to bore you with a recipe for this because you can do whatever you want with these things. I used Pillsbury pizza dough which comes in one of those scary pop-open cans (doyouknowwhatimean?...one of those cans where you slowly peel away the wrapping on the outside until the can bursts open like BLAM!)
You can stuff the thing up with anything you want. I will definitely use more eggs next time. You can almost just make scrambled eggs with anything you like to add and then roll it up in that dough, and bake for about 15 minutes.

Instead of a traditional recipe, I will simply give you some tips for this:

*Cook or saute whatever meat or vegetables you will be using until the meat is brown or the vegetables are slightly tender.
*Mix together about 4-5 eggs, and scramble them with whatever filling (meat/veggies/cheese) you are using
*Roll out your pizza dough into more of a long rectangle so once the filling is added and folded it, you will have a log-shaped calzone that you can cut across.
*Add the egg filling down the center of the dough rectangle.
*You can fold the edges it and pinch them together at the top.
*Brush the dough with an egg white wash OR just use some cooking spray to lightly coat the dough (I used olive oil spray)
*Use the timing/temperature on whatever pizza dough package you use. Just make surethe dough is cooked all the way through. I believe I did about 20 minutes at 350 F.
Allow to cool for at least 10 minutes before cutting into the calzone.

Saturday, April 16, 2011

Basil Roasted Chicken Salad With Avocado

It is hard to believe avocado was once on my "do not consume" list.


It was one of those foods that just clicked for me in my adult life. Perhaps I just grew tired of saying "no avocado please" when ordering at restaurants since they manage to work it into every sandwich, salad and beyond here in California. It is now rare that a day goes by where I do not eat this creamy, buttery fruit.

So when my friend, Elysse, over at The Daily Binge told me about the "Avocado Takedown", I decided that was a great way to get my avocado on last Sunday.


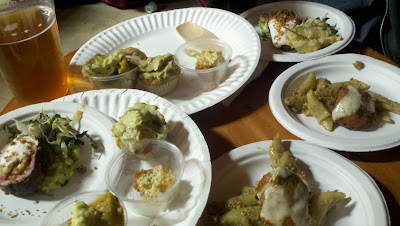
Let me explain this to you: 20 local chefs, 20 dishes featuring avocado, 20 samples to taste/judge (top chef style), $10, stuffed.


This event was just the perfect example of what I love about LA. There is always so much to do. Even when you think you might not have anything exciting to do on a Sunday afternoon, an irresistible event somehow makes its way through your email inbox or on your facebook newsfeed. I cannot think of anything in the world that would have been more worth my time last Sunday afternoon. I ate like a king for just $10, well...a king who really likes avocados.


The dishes were creative. I realized avocado was far more versatile than they usually get credit for. I remember a couple years ago, my friend Candace made vegan chocolate cupcakes with a "secret ingredient", and no one could guess what it was. When she told us it was avocado, it finally made sense that this fruit really does have the consistency of butter. The flavor is mild and nutty which is always something that works well with desserts. In fact, my favorite dish from the competition was a dessert.

Avocado cream cheese cake with mint whipped topping.


Other interesting dishes were:

The avocado bacon muffin:


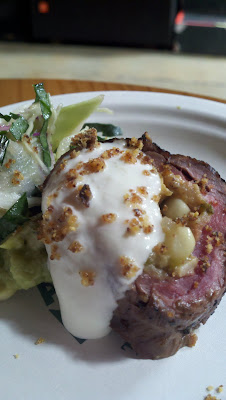
An avocado and nut mixture wrapped in steak with a side slaw:


Avocado pesto pasta with an avocado "meatball" on top:


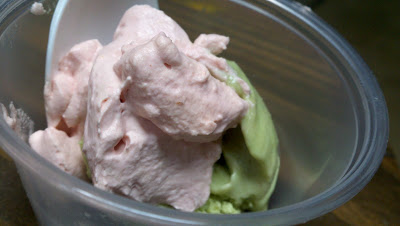
Avocado ice cream with pomegranate whipped topping:


Dark chocolate avocado caliente cupcake:


Then they gave us these cute bags on the way out:


Sunday night has become "Sunday Night Salad" Night at the Lindzachary household. Even after being stuffed with avocado-based foods all day, I could not resist throwing it into the salad I made. This recipe is a copycat for one of my favorite new salads to order for lunch while on the job. It is from Doughboy's Cafe and Bakery which has recently taken over as lunch king at work. Every day my coworkers Sara (at Lovely Clear Sweet, Ally and I mildly struggle to decide where to order our lunch from. If we are honest, the struggle is always to figure out a place that will satisfy us at least half as much as Doughboys since we cannot eat there every single day (record: 4 days in a row). I even found myself there with Zach and Stanley one Friday night; I cannot get enough of this place. They have amazing salads (favorites include "the works", the chef salad" and "basil roasted chicken salad"), freshly baked bread that is soft and well, doughy (I could make a mattress out of this plush ciabatta bread that comes with the salads), and they have a huge rest of the menu that includes "the after-school special: a huge grilled cheese sandwich and a PINT of chunky/creamy tomato soup, sloppy joe's, etc. They also have an extensive brunch menu that includes things like rice krispy pancakes and malted cornmeal pancakes; that will have to be a different story.

I copied the basil roasted chicken salad for dinner. While the salad was good, and I got pretty close, I would still recommend trying out the real thing...it really cannot be beat.


Copycat Doughboy's Basil Roasted Chicken Salad:
2 boneless/skinless chicken breasts (or about 6 boneless/skinless chicken tender cutlets)
2 navel oranges
1 bunch of basil (a generous handful)
mixed greens
tomato
gorgonzola cheese
roasted walnuts
1 avocado
1/4 c Citrus olive oil (I happened to have some, but you can just use canola oil with a drop of orange extract)
1/4 c White balsamic vinegar

Cut one orange into 4 sections. Squeeze the juice out and place juice with the peel in a plastic bag. Chop up half of the basil, and ad to the bag.
Add the chicken breasts or tenders to the bag and marinate for at least an hour (or overnight).
Heat a pan over med-high heat.
Add a tablespoon of oil to the pan.
Cook the chicken in the pan, about 3-5 minutes on each side until cooked all the way through.

In a large bowl, add mixed greens, the other orange (peeled and sliced), the gorgonzola cheese, the avocado (peeled and sliced), the tomato (chopped), the rest of the basil (chopped) and the roasted walnuts.

Mix the oil and vinegar thoroughly and toss into the salad. Once the chicken is cooled, chop it up and toss it in.

Sunday, April 3, 2011

The Getting There

I know it seems like I got engaged and just forgot about you all.


This is not the case. It is the #1 drawback to having a regular blog: entry guilt. When I fail to post a new entry at least once a week, a sense of anxiety creeps in. I have been feeling guilty and shameful for seemingly abandoning my blog for the first time in a year and a half. However, this sense of anxiety, guilt and shame was trumped by the only thing that has the power to trump my desire to cook and write about it: pilot season. Remember? I told you all about it a few years ago in this post.

This was the busiest one yet, and my life has been JELLO for the past month and a half. I have not cooked a single thing that entire time, but even if I had, there would have been no time to write about it. I am pathetically making my way back into almost a normal lifestyle (although things are still quite busy), and that includes this.


It was the birthday of my dear friend, Sara, and I wanted to make her something special for this debut back into the world of recipes.

I realized that we are entering the stage of life where we may still look forward to birthday parties (a chance to spend time with friends and eat yummy sweets), but we no longer look forward to birthdays. It may sound ridiculous coming from someone my age, but we fear becoming older. It is not the wrinkles or the gray hairs that being to pop up every now and then (although that stuff sucks on it's own); it is the quarter-life crisis, this in-between stage where you may not be where you pictured yourself ending up as an adult whether it be career, family, spiritual-life or finances. As kids, when we dreamed of what we would be when we grew up, we completely neglected to consider this step of actually giving ourselves the opportunity to get there. It is a time in life that few people really anticipate: the getting there.

Sometimes I find myself getting impatient, wanting to rush through this stage of life towards a more settled and secure future. However, I have come to appreciate this time to soak in all of my twenties have to offer, to gain new experiences, make new friends and continue to develop old friendships. These experiences give me perspective for the future and these friendships get me through the experiences. See how that works?

I made these cookie cupcakes for Sara's birthday because she is my friend and has helped me through many an experience since I have known her. She loves to bake and is super at it. You can visit her blog, Lovely Clear and Sweet for her great recipes. I, on the other hand, tend to perform poorly in this arena. I wanted to ease back into making more new recipes with something simple, yet original. I think these were just the thing for a simple sweet treat.


Peanut Butter Cookie Cupcakes with Chocolate Chip Frosting

1 bag of mini chocolate chips
1/2 c crushed peanuts
your favorite peanut butter cookie recipe (you can really do this with any cookie recipe)

Preheat oven to 350 degrees F
Drop cookie dough balls into greased cupcake pan
Bake for about 13-15 minutes (until the tops begin to brown.
When the cookies are still hot and in the pan, sprinkle chocolate chips generously over the top of each.
You can let them melt and spread the chocolate around like frosting or you can leave the chocolate chips in tact for a textured look.
Sprinkle some crushed peanuts over the top, and pop the cookies out of the cupcake pan once they have cooled off a bit.

Monday, February 21, 2011

If You Like It...

....then you better put a ring on it.


Sorry ladies, Zach is officially off the market. Just shy of our 5 year anniversary, we were engaged to be married after a middle-of-the-wilderness-hike proposal. He took me to the middle of the Malibu mountains to "ask some big questions", as he put it. After the big Q, we continued hiking for another six hours through beautiful waterfalls and cascading streams before reaching civilization again. He really made me work for that ring that day! We then had an amazing dinner at Pizzeria Mozza, a restaurant I have wanted to try for years. It was just the sweetest day, full of doing the extravagant version of the things we normally do every Saturday: hiking and eating out. I am very excited to share this news, and I will keep you posted on the details!

Red rock with gray stripe (how did this happen?):


My fiance with his machete:


A couple video representations of about the half-way point. Unfortunately we do not have pictures of the last quarter of the hike which is the absolute most beautiful part with tall trickling waterfalls and long flat cascading rocks. It was dark by the time we got there!:


As you can tell, Stanley was very happy to hear the news. He keeps sniffing my ring.

Friday, February 18, 2011

The Mezza

In Spain, it is tapas; in China, it is dim sum; in France, it is hors d'oeuvres; in Lebanon, it is mezza.


I love to eat this way. We like to call this type of tasting and snacking "appetizers" or as Zach's dad likes to say "appe-TEASERS". However, with the popularity of the eating-several-small-meals-instead-of-three-big-ones diet that is finding it's way into the American food culture, eating appetizers or sharing small plates for dinner has become something I now see regularly when dining out (and I do dine out quite regularly these days!). Now, I am not quite sure that this whole "several small meals" thing is something I completely buy into. I like to think people are capable of eating three meals without going overboard, maybe with a couple healthy snacks between. And when I go out for tapas, dim sum or mezza, it does not necessarily mean I will be eating less; it just means I will have the opportunity to taste more delicious plates. I will admit, this process slows me down and allows me to enjoy and appreciate each dish on another level which might ultimately lead to less of a calorie intake. It just seems like this dining method was made for people like me, you know, the people who like to"try" everything on everyone else' plate at the table after rushing through their own meals.

I made a mezza last weekend after we tasted a new Lebanese plate at one of our favorite Lebanese food spots in LA, Pi on Sunset. The dish was Kofta in Pita which is exactly what it sounds like: Kofta (or Kafta) in pita bread. It is like a Lebanese quesadilla (with no cheese). It was delightfully delicious so I decided to try it at home. I did cheat by buying the meat already spiced from an Armenian bakery, but I am sure this would work perfectly with any Kofta recipe.
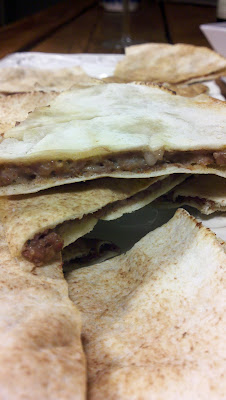


The other dish I made was something for which I hold very fond memories. When I had a chance to visit Lebanon years ago, I would go to the bakery some mornings to bake my own manakeesh. This is essentially a thinly rolled bread topped with one of a few different toppings: zaatar (a sesame/thyme spice mixture), cheese or minced lamb meat. I used to call it :Lebanese pizza" when I was little. I suppose I like to compare every dish to something that is familiar. I did not make my own dough for this version, but you certainly can if you wanted to try it. There are several recipes available online. I am fortunate enough to have several greek and Armenian bakeries close by so I was able to buy some bread on which to spread the various toppings. It is the kind of thin bread that is almost like a thick pita.

Both of these recipes are super simple, and they are a great start for a Lebanese mezza if you ever feel adventurous enough to try one.

KOFTA IN PITA
2 large pita bread rounds (between 12 and 16 inches)
1/2 pound kofta meat (recipe here)
butter (room temperature)

Preheat the oven to 350 degrees F.
Gently open the pita so that the whole inside is facing upwards...if you are using the real thing, the bread should be thin so be careful
Spread a very thin layer of butter on the inside of each half. (The butter will be on the same side of the bread as the meat).
Place half of the meat (1/4 lb) onto each of the open pitas; try to plop it around different places so it is easier to spread out.
Close the pita by folding the two halves back together.
Gently press the bread together, smashing the meat so it spreads evenly. I used a roller on the outside of the bread to flatten it even more evenly.
The pita should basically look like it did at first, but with a meat layer in the middle
Cut each pita into 6 triangles with a pizza cutter of a large sharp knife.
Place triangles onto a baking sheet lines with foil.
Bake at 350 degrees F for 5-10 minutes (until meat is cooked just all the way through.
Serve with hummus, labneh or just eat plain.


MANAKEESH

4 thick bread pitas (The kind that does not separate in the middle and is more like pizza dough. You can find these in midle eastern grocery stores, or you can use homemade or store-bought pizza dough)
1-2 tbsp zaatar (spice found in most grocery stores but definitely in middle eastern grocery shops)
4 oz Halloumi cheese (specialty cheese shops or middle eastern groceries)
good quality olive oil (I used garlic olive oil)
2 pinches of hot paprika

For manakeesh with zaatar:
Drizzle olive oil onto the bread (baked or unbaked)
mix the zaatar with olive oil. (keep adding the oil slowly and mix it until the spices turn into more of a wet paste...the consistency of mud)
Spread the zaatar thinly over the bread (use more or less to taste)
Bake at 400 degrees F for 5-10 minutes (or until bread is done and slightly toasted).


For manakeesh with cheese:
Drizzle olive oil onto the bread (baked or unbaked)
Crumble cheese and sprinkle it generously on the two pitas.
Drizzle a tad more oil over the cheese and sprinkle a pinch of hot paprika over the top
Bake at 400 degrees F for 5-10 minutes (or until bread is done and slightly toasted).

Thursday, February 10, 2011

Classy Classic Key Lime Pie

I think I like Key Lime Pie now.


I don't usually go for the fruity desserts. I prefer chocolate/vanilla/bready/cakey/creamy desserts. I made key lime pie for the first time just because I know it is one of Zach's favorites. It was definitely delicious, and well worth making. It was just not the classic version of the beloved dessert. I made key lime pie for the second time not only because it is one of Zach's favorites, but also because his mom sent me home after the holidays with a bottle of some really great key lime juice and a classic recipe.


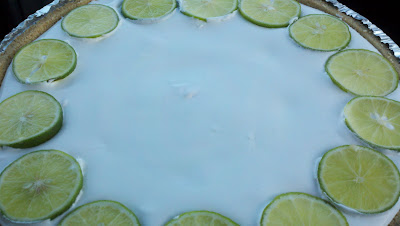
That was half the battle, and we all know I am all about convenience. This pie was the easiest thing. It took such little effort that I had to keep re-reading the recipe to make sure I was not missing something. Granted, the recipe called for a meringue topping that would have made it more challenging. I opted to do a thick whipped topping with a tad of vanilla extract mixed in.

You are going to look twice at this recipe before asking the question, "where is the baking time?" While the recipe includes 4 egg yolks, there is no baking. Apparently,the acidity in the lime juice acts as a "cooking agent". I did have trouble with the pie setting. I just stuck it in the freezer overnight, and it was cool and delicious the next day. I looked online and a lot of people suggest just going ahead and baking it for 10 minutes at 350 degrees F to make sure it sets while other online key-lime pie purists suggest that if you bake it, it is not true key lime pie. Either way, the taste was perfect. You just need to work with the texture whether that means beating the eggs and condensed milk a little more before adding the lime juice, baking it briefly before cooling or just sticking it in the freezer for a cool refreshing treat.


Manny's Authentic Key Lime Pie (from Manny's and Isa's Kitchen in Islamorada, FL)

(recipe adapted, original recipe includes a meringue topping)

1 14 oz can Eagle Brand condensed milk
4 large egg yolks (separated from the whites)
4 oz key lime juice
1 pie crust, baked and cooled (I used an already made graham cracker crust)
1 tub whipped topping
1 tsp vanilla extract
2 key limes (for garnish)

Beat egg yolks and then add condensed milk. Mix thoroughly.
Add key lime juice and mix again.
Pour mixture onto baked and cooled pie crust.
Refrigerate pie for at least an hour (or if you would like to bake it first, bake at 350 degrees F for 10 minutes, and then refrigerate until completely cooled).
Once the pie is set, Mix vanilla extract into the whipped topping.
Spread whipped topping generously over pie.
Garnish with sliced key limes (optional).
Put back into refrigerator until ready to serve.

Note: If your pie has trouble setting, place it in the freezer for a couple hours to give it a better texture.

Tuesday, February 1, 2011

Orange Crunch Cake: Walking on Water

Zach and I were chatting creek-side on our weekend hike through Paradise Falls.


Stanley was trotting among the large rocks that were embedded in the shallow water leading up to the waterfall's large pool. He was drinking and splashing around and exploring the new world as he walked "on" the water.

All was well with the world when I heard a loud "PLUNK!". I turned back towards where Stanley had been playing, and he was gone, completely out of sight. I was in shock for a moment before his skinny little face popped out of the water, and his long lean legs started paddling. Stan had "explored" himself right into the deep water of the pool at the base of the waterfall...just walked right in!

We were all in for surprises that day. Stan must have been surprised that the ground that has always been below his paws completely vanished for a moment. Zach and I were surprised we didn't have to jump into the freezing cold water after him. He swam the few feet back to the solid ground and pulled himself back up to safety. He made "learning" to swim look like a piece of cake.


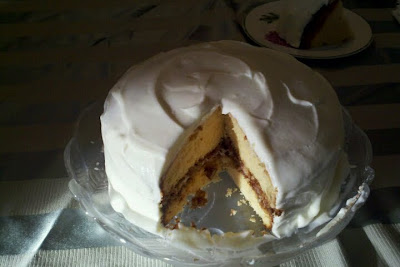
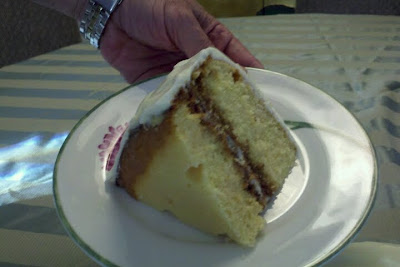
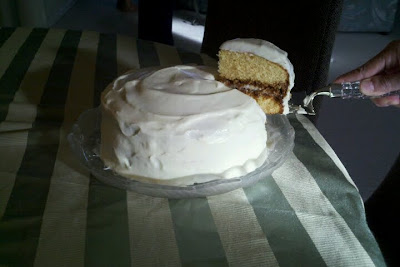
I made this cake for a family gathering during New Years. It was a simple recipe I pulled off of allrecipes.com. It is a great treat for a brand new year. It is a nice little twist on a regular ole layer cake. There is a nice orange flavor, and the deliciously surprising crunch layer adds some interesting texture. I used some homemade cream cheese frosting which turned out pretty well. However, I might try this again with a different kind of vanilla frosting with more body to it. I am just not a fan of cream cheese frosting no matter how hard I try to be.


Orange Crunch Cake

(recipe slightly adapted from allrecipes.com)

CRUNCHY, CRUMBY FILLING:
1 cup graham cracker crumbs
1/2 cup brown sugar
1/2 cup chopped walnuts
1/2 cup butter, softened

CAKE:
1 (18.25 ounce) package yellow cake mix
1/2 cup water
1/2 cup orange juice
1/3 cup vegetable oil
3 eggs
2 tablespoons grated orange zest (I used orange extract instead - read label for the measurement equivalents)

Preheat oven to 350 degrees F (175 degrees C). Grease and flour two 9 inch pans. Combine the graham cracker crumbs, brown sugar, walnuts and butter. Divide mixture evenly between the prepared pans. Set aside.
In a medium bowl, mix together the cake mix, water, orange juice and oil until blended. Beat in the eggs, one at a time, then stir in the orange zest. Pour the mixture evenly over the crunch layer in the pans.
Bake in the preheated oven for 30 minutes, or until a toothpick inserted into the center of the cake comes out clean. Allow to cool for 10 minutes, then invert onto a wire rack and cool completely before frosting. Frost (crunch side up) between layers, on top and sides. Arrange orange sections on top, then refrigerate.


Whipped Cream Cheese Frosting

(recipe from allrecipes.com)

1 (8 ounce) package cream cheese
1 cup white sugar
1/8 teaspoon salt
1 teaspoon vanilla extract
1 1/2 cups heavy whipping cream

In a small bowl beat whipping cream until stiff peaks form; set aside.
In a large bowl combine cream cheese, sugar, salt and vanilla. Beat until smooth, then fold in whipped cream.

Monday, January 17, 2011

Cilantro Lime Dressing with a Kick

It is really not easy to eat healthy.


I have developed some pretty healthy eating habits over the past 15 years. It is quite common for me to eat about 7-8 salads per week, often more. However, I am sure my health conscious readers are well aware that while a salad can be your best friend, it can also be a deceitful little enemy. I used to think a good rule of thumb was if you really like the salad, it is probably bad for you.


That doesn't have to be true if you focus on bringing rich flavors to a hearty salad. I have to be creative by giving myself enough variety in salads so I don't get sick of eating them. Of course, I have my go-to options for some healthy take-out or dining-out. Here are some of my favorites in the LA area:

Chicken Chow Salad - Lulu's Cafe
Greek Salad (with chicken) - Trimana
The Cowboy Salad (I sub low cal honey mustard dressing for the blue cheese dressing w/honey drizzle) - Mixt Greens
California Chicken Salad (86 croutons and pasta with low cal ranch dressing) - California Chicken Cafe
Debbie's Chopped Salad (eat it with a big spoon!) - Factor's Famous Deli
Raw Salad with chicken (this is no longer on the menu, but they will make it if you ask)- Tender Greens

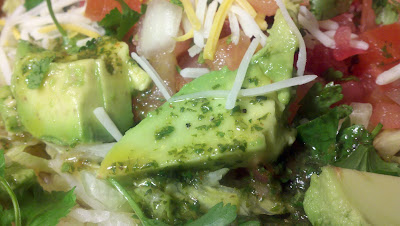
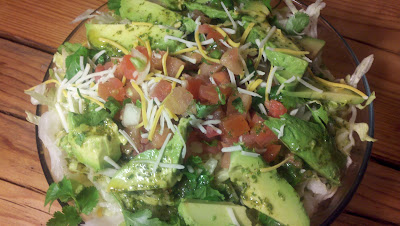
By focusing on hearty flavorful ingredients, a salad can be healthy and still satisfying. This simple dressing will add so much flavor to any salad, you will not need to add all the things that would make it bad for you to feel satisfied. You also do not need too much of the dressing itself. I added a couple tablespoons to a big bowl of my southwestern chicken salad . I couldn't get enough.


The recipe from Women's Health Magazine, calls for safflower oil (something basically no one has in the pantry) so I used olive oil instead.


Cilantro Lime Dressing with a Kick

(recipe adapted from Women's Health Magazine)

1/2 tsp hot sauce
3 tsp lime juice
2 tbsp cilantro
1/4 c oil (olive oil or safflower oil)

Blend the first 3 ingredients in a blender and then add the oil to blend.

Saturday, January 8, 2011

The 2nd Best Cuban Sandwich

A trip to Florida makes me hungry for Cuban.


In California, I am all about the delicious Mexican food. El Cholo (at the original location on Western Ave in Los Angeles, of course) is not only one of my favorite Mexican restaurants, it is one of my absolute favorite restaurants. Everything is just delicious, and the atmosphere is casually classy and laid back.

In Florida, the specialty is Cuban food and in California it is Mexican food; as you can imagine, it is heavily due to the proximity of each state to their respective countries. Now, I should be fair to say Los Angeles has some great Cuban restaurants like Versailles and El Colmao and parts of Florida have some wonderful Mexican restaurants like La Fiesta in Gainesville, FL or even the gourmet Mexican Restaurant chain, Cantina Laredo that you can find in several states (but not California). This is 2011; great food and people that make great food can be thousands of miles from the homeland.

However, the Cuban sandwich takes me back to my college days in Florida when Zach and I first started dating in Gainesville. We became regulars at this hip little Cuban bakery called Flaco's . It was where I fell in love with the Cuban sandwich. I rarely order a Cuban sandwich anywhere anymore; there are usually much more exciting option on the menu of a good Cuban restaurant like ropa vieja, beans and rice and fried plantains (sweet or unsweet are both fine by me!). But I sometimes find myself craving one of the two type of Cubans Zach and I used to share at Flaco's: the standard Cuban or the Medianoche (which was made with their special slightly sweetened bread). They used the most delicious Cuban-style shredded pork and the freshest, soft-on-the-inside-crunchy-on-the-outside pressed Cuban breads.
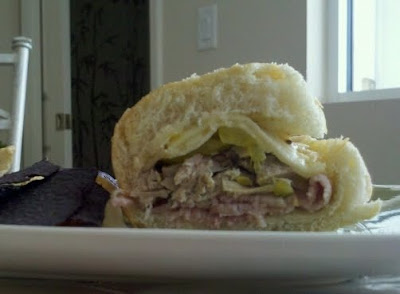
Cuban sandwiches are so simple to make at home. Yuu will never make them as well as Flaco; I can promise you that. But you can make some pretty-darn satisfying sandwiches with just a tiny bit more effort than it would take you to make a standard ole' ham and cheese sannie.


The Cuban Sandwich

(makes 4 6-inch sandwiches)

*1/2 lb Pork (shredded Cuban pork is the best, but you can use sliced roasted pork from the deli counter at the grocery store. If that is not an option, I would suggest roast beef as a last resort)
*1/2 lb Ham
*1/2 lb Swiss cheese
*Pickles (sliced lengthwise)
*Mustard (regular mustard works the best, but I have used specialty mustards to change things up)
*Fresh Cuban bread (1 long one should work) - (You can use a baguette if you cannot find Cuban bread, especially if you are going to press the sandwich anyway)

I don't think I really need to explain what you do next besides just saying, "assemble the sandwich".

You can eat your delicious sandwich at this point if you wish, but I suggest pressing it if you own some sort panini or sandwich press. You may want to lightly spread some oil, butter or butter-type spread on the outside of the bread before placing the sandwich into the press. If you are pressing, I would also suggest putting the ham on the bottom, then the shredded pork, then the cheese, then the pickles on top (the mustard can be slathered onto the bread directly). This way, the cheese melts right into the shredded pork. Yum.

Note: I did not have a press to use this time so I just stuck the sandwiches in the oven on a low setting to give them a little crunch.

Thursday, January 6, 2011

Do Da Dip, Guacamole Feta Salsa Dip

I put my hand upon your hip. When I dip, you dip, we dip.


Do you remember dancing to that song at middle school dances? If so, welcome to my generation.

There are a handful of songs that "take me back". It is so strange the music that is nostalgic to one generation can mean nothing to the next. Artists like Justin Bieber, Lady Gaga and the Jonas Brothers are the Backstreet Boys, Britney Spears and Hanson to the next generation. I suppose if you want to know how old someone is, it could be pretty revealing to start up a conversation about the music they grew up with.

I am more of a movie person myself (not that the two need to be exclusive). I am so behind with even popular music as an adult, but there are songs you just couldn't escape when I was growing up, mostly due tot the fact that you actually had to buy expensive CD's if you wanted to listen to specific music (back in my day). Otherwise, you were stuck with the radio. Here are a couple songs that would make me nostalgic from when I was growing up (even though some might say I still am):

"All MY Life" - KC & JoJo
"I Swear" - All for One
"Killing Me Softly" - The Fugees
"Ironic" - Alanis Morissett
"Time of Your Life" - Green Day
"BIG Papa" - Notorious B.I.G.
"I'll be Missing You" - Puff Daddy (as he was called "back in the day") and Faith Evans (this song was recorded in response to Notorious B.I.G.'s murder in the 90's.
"Dreamlover" and "Hero" (and any other song by Mariah Carey)
"I want it That Way" - Backstreet Boys
"Baby One More Time" - Britney Spears
"Bye Bye Bye" - N'Sync
"MMMMMBop" - Hanson


There are really too many to bother continuing listing them. I suppose this song list might reveal something besides my age. It might reveal the fact that I was not really an edgy kid growing up or I might have listed more alternative rock type music. And of course there are songs that "take me back" that are not from my generation at all like selections from some of my favorite musicals or songs from the soft rock station my mom used to listen to in the car, "Warm 94.9".

I wonder what ever happened to that "Da Dip" song. It was just so simple, and it really used to get people out on the dance floor. This dip has a bunch of ingredients, but it is pretty simple too. Though I doubt it would get anyone on the dance floor; it might be more of a lazy afternoon watching football kind of dip. In fact, this was the very dip enjoyed by Zach's and my family when we got together over New Years to watch the Gators win the Outback Bowl.


Da Dip: Avocado Feta Salsa Dip

(recipe adapted from Allrecipes.com - makes about 4 cups of dip)

3 plum tomatoes, chopped
3-4 ripe avocado - peeled, pitted and chopped
1/2 cup finely chopped red onion
2 clove garlic, minced
1 handful fresh chopped cilantro
1 tablespoon olive oil
2 tablespoons lemon juice (original recipe used red or white wine vinegar, but I didn't have any, and the lemon juice was great - lime would work too)
4 ounces crumbled feta cheese

In a bowl, gently stir together tomatoes, avocados, onion, and garlic. Mix in cilantro. Gently stir in olive oil and lemon juice. Then stir in feta. Cover, and chill for at least 1 hour (preferably 2-6).

This dip can also be used creatively as a topping for some grilled chicken or a spread in a nice fresh turkey sandwich. It is very different from a salsa and also pretty different from a guacamole. You can use less avocados and more tomatoes if you wish as well. Enjoy!