Showing posts with label Thanksgiving. Show all posts

Saturday, November 27, 2010

Thanksgiving 2010 - Sweet Potato Casserole Time

I had a helper in the kitchen when I was cooking my Thanksgiving feast.


Stanley loves to follow me around the kitchen while I cook. I thought he was looking for handouts, but I never gave in as to keep from encouraging it. However, I realized the other day that he follows me around the house in the kitchen or out. If I am working on the computer in the bedroom, he stands there next to me. He was not looking for handouts in the kitchen (I was making vegetables at the time, not exactly tasty to him), he just wanted to be with me. Nothing made my Elmyra side happier than this revelation. I knew he could never resist a cushy spot on the ground as long as it was in the same room so I put his bed in the doorway of the kitchen so we could hang out together, but he would not be in the way of my every step. I know he was happy to be there with me, but it made me really happy too to have the company. Such a sweet boy.


I did make something sweet for the Thanksgiving table this year, and I am not talking about the dessert. Sweet potato casserole has been one of my specialties growing up. From the time I was in college (and felt the need to contribute something of my own to the family feast), I would make a sweet potato casserole, garlic cheese biscuits and some sort of dessert. In the past, I have used canned sweet potato chunks for the base of this "recipe". I say "recipe" because I have never really followed any sort of instructions to make this. This year, I decided to keep with my make-from-scratch theme and bake the potatoes. Sweet potatoes are so creamy and delicious, I could have eaten them right out of the oven just the way they are. The natural sugar gives the skin a caramelized taste. I added a couple new things to my "recipe" this year that I think worked really well including bits of the skin (bonus fiber and some nice texture) and ground almonds for a nice smooth nutty flavor.


Stanley Is Sweet Potato Casserole

(Serves 6)

4 sweet potatoes
1 tbsp brown sugar
1/4 C half and half
1 tsp cinnamon
1 tsp nutmeg
1/4 ground almonds (plus a little to sprinkle for the topping)
1/2 C pecan pieces
1 C mini marshmallows

Preheat oven to 400 degrees F.
Individually wrap each potato in foil, and bake for about an hour (until completely fork tender).
Turn oven down to 350 degrees F.
Scoop out flesh of baked sweet potatoes, and mash with a potato masher (you can use a fork if you like them to be chunkier)
Chop up the skin of one of the potatoes into small pieces and sprinkle into the mashed potatoes.
Add half and half, brown sugar, cinnamon, nutmeg and ground almonds and mix together until combined.
Fold in pecan pieces.
Transfer mixture to a square 8" casserole dish; spread evenly into the dish.
Sprinkle some ground almond on top of the mixture, and evenly sprinkle marshmallows on top (you can also sprinkle a pinch of cinnamon on top of the marshmallows).
Put the casserole back in the oven for about 20 minutes (or until the marshmallows start to toast.

Thursday, November 25, 2010

Thanksgiving 2010 - Green Bean Casserole Time

I realize this is a little late, but I have some great Thanksgiving recipes for you.


The good news is most of these dishes, you can make anytime of year. Of course you are welcome to make a huge turkey and gravy anytime of year, but those dishes are better left to have something to look forward to each November.

My parents visited for Thanksgiving this year which I could not be more excited about. When preparing a Thanksgiving feast, little to no consideration goes into how many people will be at my table. My turkey is 13 lbs, they only sell Yukon Gold potatoes by the 1 1/2 lb, and 1/2 of my aunts stuffing recipe still contains 2 lbs of beef. The good news is, I am hosting this dinner at my place this year which makes for quick and easy storage of leftovers to eat for weeks! There was a cutthroat process to limit f=down the dishes that ended up making it onto the table. I recently painted a wall in my kitchen with chalkboard paint, and I decided to map out the meal there.

I wrote out all my ideas and then went all "politician" on it, making "line-by-line" cuts to the budget...the only difference is, I actually did make cuts, significant cuts like slashing the rum cake, succotash and mac and cheese.


Truth be told, I wanted to be sure to make some dishes I haven't made before so that I could share them on my blog. That is something I really appreciate about keeping this blog; it keeps me on my toes, trying new things instead of getting to complacent with my cooking comfort zone.

Green bean casserole is something I wanted to make from scratch this year. My dad has always been responsible for this dish when my whole family gets together, and it solely consists of cans: canned green beans, canned cream of mushroom soup, canned fried onions...oh a bag of chopped pecans as well. Now, don't get me wrong. I have learned to love this "dump and go" green bean casserole over the years, but I wanted to try to make it from scratch to see how it holds up. I used a popular recipe from Alton Brown, and I dare to say it was worth the extra effort. I may tweak it a bit next year by adding more green beans and also adding pecans (the way my dad does), but I highly suggest this recipe for the essential Thanksgiving dish.


I am particularly confident in recommending this recipe because it happened to be Zach's favorite dish at the table this year, even though he does not like green beans. There are several more recipes where this came from so stay tuned!

Alton Brown's Best Ever Green Bean Casserole

(recipe from Food Network's Alton Brown - serves 6)

For the topping:
2 medium onions, thinly sliced
1/4 cup all-purpose flour
2 tablespoons panko bread crumbs
1 teaspoon kosher salt
Nonstick cooking spray
For beans and sauce:
2 tablespoons plus 1 teaspoon kosher salt, divided
1 pound fresh green beans, rinsed, trimmed and halved
2 tablespoons unsalted butter
12 ounces mushrooms, trimmed and cut into 1/2-inch pieces
1/2 teaspoon freshly ground black pepper
2 cloves garlic, minced
1/4 teaspoon freshly ground nutmeg
2 tablespoons all-purpose flour
1 cup chicken broth
1 cup half-and-half
Directions
Preheat the oven to 475 degrees F.

Combine the onions, flour, panko and salt in a large mixing bowl and toss to combine. Coat a sheet pan with nonstick cooking spray and evenly spread the onions on the pan. Place the pan on the middle rack of the oven and bake until golden brown, approximately 30 minutes. Toss the onions 2 to 3 times during cooking. Once done, remove from the oven and set aside until ready to use. Turn the oven down to 400 degrees F.

While the onions are cooking, prepare the beans. Bring a gallon of water and 2 tablespoons of salt to a boil in an 8-quart saucepan. Add the beans and blanch for 5 minutes. Drain in a colander and immediately plunge the beans into a large bowl of ice water to stop the cooking. Drain and set aside.

Melt the butter in a 12-inch cast iron skillet set over medium-high heat. Add the mushrooms, 1 teaspoon salt and pepper and cook, stirring occasionally, until the mushrooms begin to give up some of their liquid, approximately 4 to 5 minutes. Add the garlic and nutmeg and continue to cook for another 1 to 2 minutes. Sprinkle the flour over the mixture and stir to combine. Cook for 1 minute. Add the broth and simmer for 1 minute. Decrease the heat to medium-low and add the half-and-half. Cook until the mixture thickens, stirring occasionally, approximately 6 to 8 minutes.

Remove from the heat and stir in 1/4 of the onions and all of the green beans. Top with the remaining onions. Place into the oven and bake until bubbly, approximately 15 minutes. Remove and serve immediately.

Sunday, December 6, 2009

I Yam What I Yam

Cartoonist Elzie Crisler Segar created a comic strip called "Popeye the Sailor" in 1929.


This not-so-handsome-but-still-charming-in-his-own-way comic hero went on to star in his own television show and films. Popeye was a gritty sailor who gathered his superhuman strength from spinach. Move over all you protein-pumping, meat-eating machos. Popeye's forearms grew 10 times bigger when he would down a can of the green stuff.

Segar's choice of spinach for the character's source of strength was due to the high iron content found in spinach in a 1870 German study. The research concluded that spinach contained just as much iron as red meat. Popeye brought popularity to the geen stuff for almost 10 years through the comic strip before it was discovered that the German study had made a mistake. The decimal point in the number for the iron content in spinach had been placed between the wrong two numbers making it appear to have 10 times the amount of iron than it really did. In reality, spinach had no more iron content than any other leafy greens. This was not realized until 1937 when the comic strip was well underway, and Popeye had no intentions of changing what was already working for him. Although I imagine if Popeye was created after 1937, he would be downing cans of sardines instead.

Of course, spinach still has plenty of wonderful vitamins that make it very good for you. I eat my fair share of fresh spinach in salads. I am not going to pretend that this casserole should be categorized as a health food. It is loaded with creamy, crunchy stuff that makes it something you really want to eat in moderation. I chose to make spinach casserole for Thanksgiving this year simply because Zach does not go for green beans so much. I am really happy with the way it turned out. I made it very small (about half of the recipe) since it was just the two of us, and I really don't imagine this keeping that well as leftovers.


Popeye's Spinach Casserole:

(Recipe adapted from All Recipes - serves 6)

20 oz frozen chopped spinach (thawed)
6 oz cream cheese (softened)*
1 can condensed cream of mushroom soup*
6 oz french-fried onions (1 can)

Preheat oven to 350 degrees F.
Squeeze thawed spinach over a colander in the sink to ring out any excess water.
Separate the spinach so it is not clumpy in a large mixing bowl.
Mix in cream cheese, mushroom soup and 1/2 of the french-fried onions into the spinach.
Transfer the mixture into a small (2 qt) casserole dish, and sprinkle the remaining onions on top.
Bake for 20 minutes, uncovered.

* The recipe calls for the whole can of soup and 8 oz of cream cheese. I think this is too much. I used the equivalent of 6 oz cream cheese and about 2/3rds of the can of mushroom soup so that the casserole would keep more of the spinach flavor. You can use more or less depending on what you prefer.

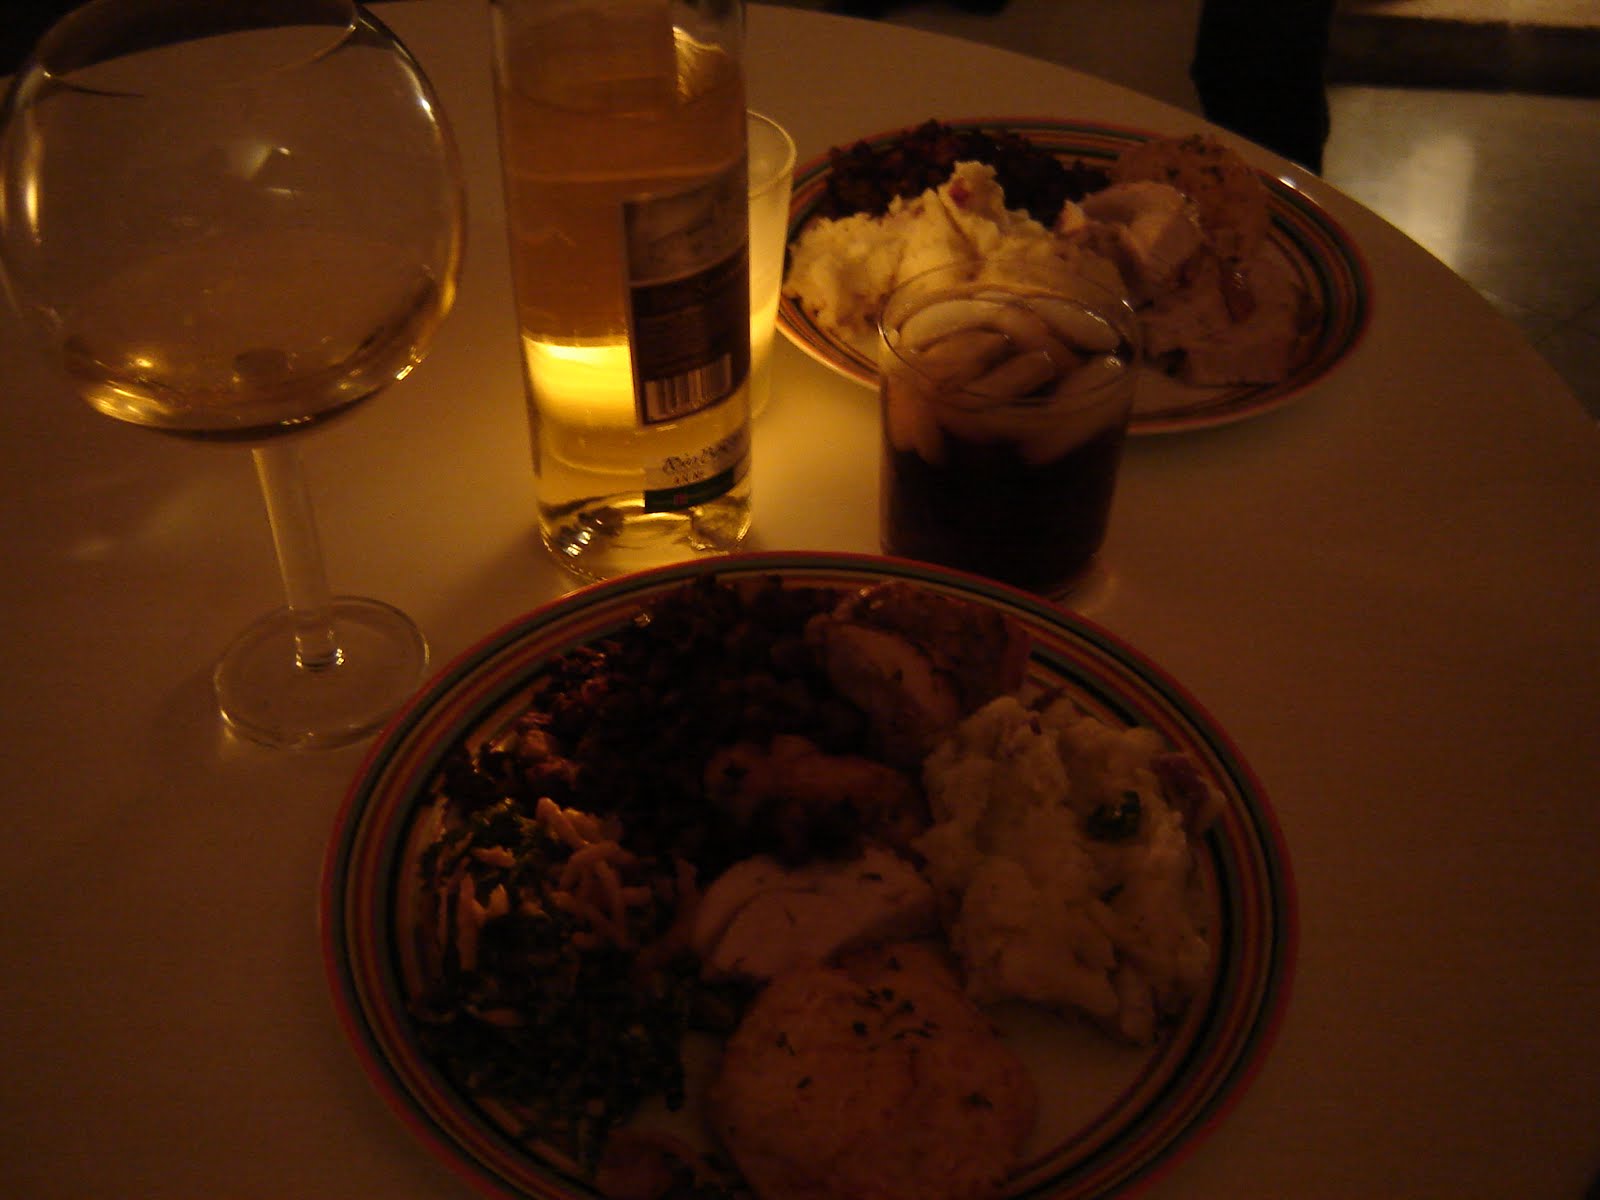
You can see how it fits right in there on the right side of the plate.

Thursday, December 3, 2009

What About Goats?

I love goat cheese. I feel as though it is also an "it food" that I failed to mention in my previous post, "It Foods."


In honor of goats and their amazing cheese below please find a few of my favorite facts about goats pulled directly from the amazing web page I found, Facts About Goats.


Goats were the first animals domesticated by man in 10,000 B.C

The phrase Judas goat is a term that has been used to describe goat that is trained to herd other animals to slaughter while its own life is spared.

Goats were the first animals to be used for milk by humans.

Goats were first brought to America by Columbus in 1493.

Worldwide, more people eat and drink milk from goats than any other animal.

A mature, healthy male buck can breed 20 to 40 does.

The pharaoh Cephranes thought so much of his goats that he had 2,234 buried with him.

Goat’s milk is easily digestible and less allergenic than cow’s milk.

Goat’s milk is higher in calcium, vitamin A and niacin than cow’s milk.

Mahatma Gandhi consumed goat milk every day for more than 30 years.

Goat’s milk is naturally homogenized, and it can be digested in less than 20 minutes where as cow’s milk can take almost all day.

Healthy kids ("kids" are baby goats) can stand within minutes after birth and are able to move with the herd almost immediately.

Goats do not have tear ducts.

Goats and octopus’ pupils of their eyes are rectangular.

Coffee was first discovered when goat herders noticed the animals acting very energetic after nibbling on coffee beans.

Abraham Lincoln’s sons had two goats that lived in the White House with them.


I made mashed potatoes for Thanksgiving (who didn't?). To me, it always seems like mashed potatoes are a blank canvas. There are so many ways to get creative with them because the taste is so mild that they sort of take on the flavor that you add to them. In the past, I have made garlic mashed potatoes, rosemary potatoes, mustard potatoes and cheddar and bacon baked potatoes all of which are easy and delicious. However, this year was the year of the goat cheese mashed potatoes.

How About Them Goat Cheese Mashed Potatoes:

(makes 6 servings)

2 lbs of potatoes (any kind you like)*
Salt (to taste...don't be shy about it)
3 tbsp butter
6 oz goat cheese (use more of less depending on preference)
1 C milk
1 tsp black pepper
fresh chopped chives (to sprinkle over top)

*If you do not want the skin and you plan to peel the potatoes, use large potatoes and cube them before boiling. I use the small red potatoes, boil them whole and mash them with the skin still on...I like the skin)

Boil the potatoes in a large pot, adding a few pinches of salt to the water.
Once the potatoes are fork-tender, drain the water from the pot.
Allow the potatoes to cool for a couple minutes.
Add the butter and salt (to taste) and mash the potatoes with a potato masher.
After you have mashed them almost all the way, add the milk, goat cheese and black pepper.
Continue mashing until the potatoes have reached the consistency you prefer.
Sprinkle the chives on top just before serving.


Note: Definitely taste the potatoes as you add the ingredients because you will likely find you would like to add more of something. I almost always end up adding more salt and goat cheese.

Pictures of goats are from PublicDomainPictures.net.

Sunday, November 29, 2009

Stuffed

Choose the word that does not belong in the following sentence.

Adjectives that describe Thanksgiving stuffing include starchy, mushy, meaty.


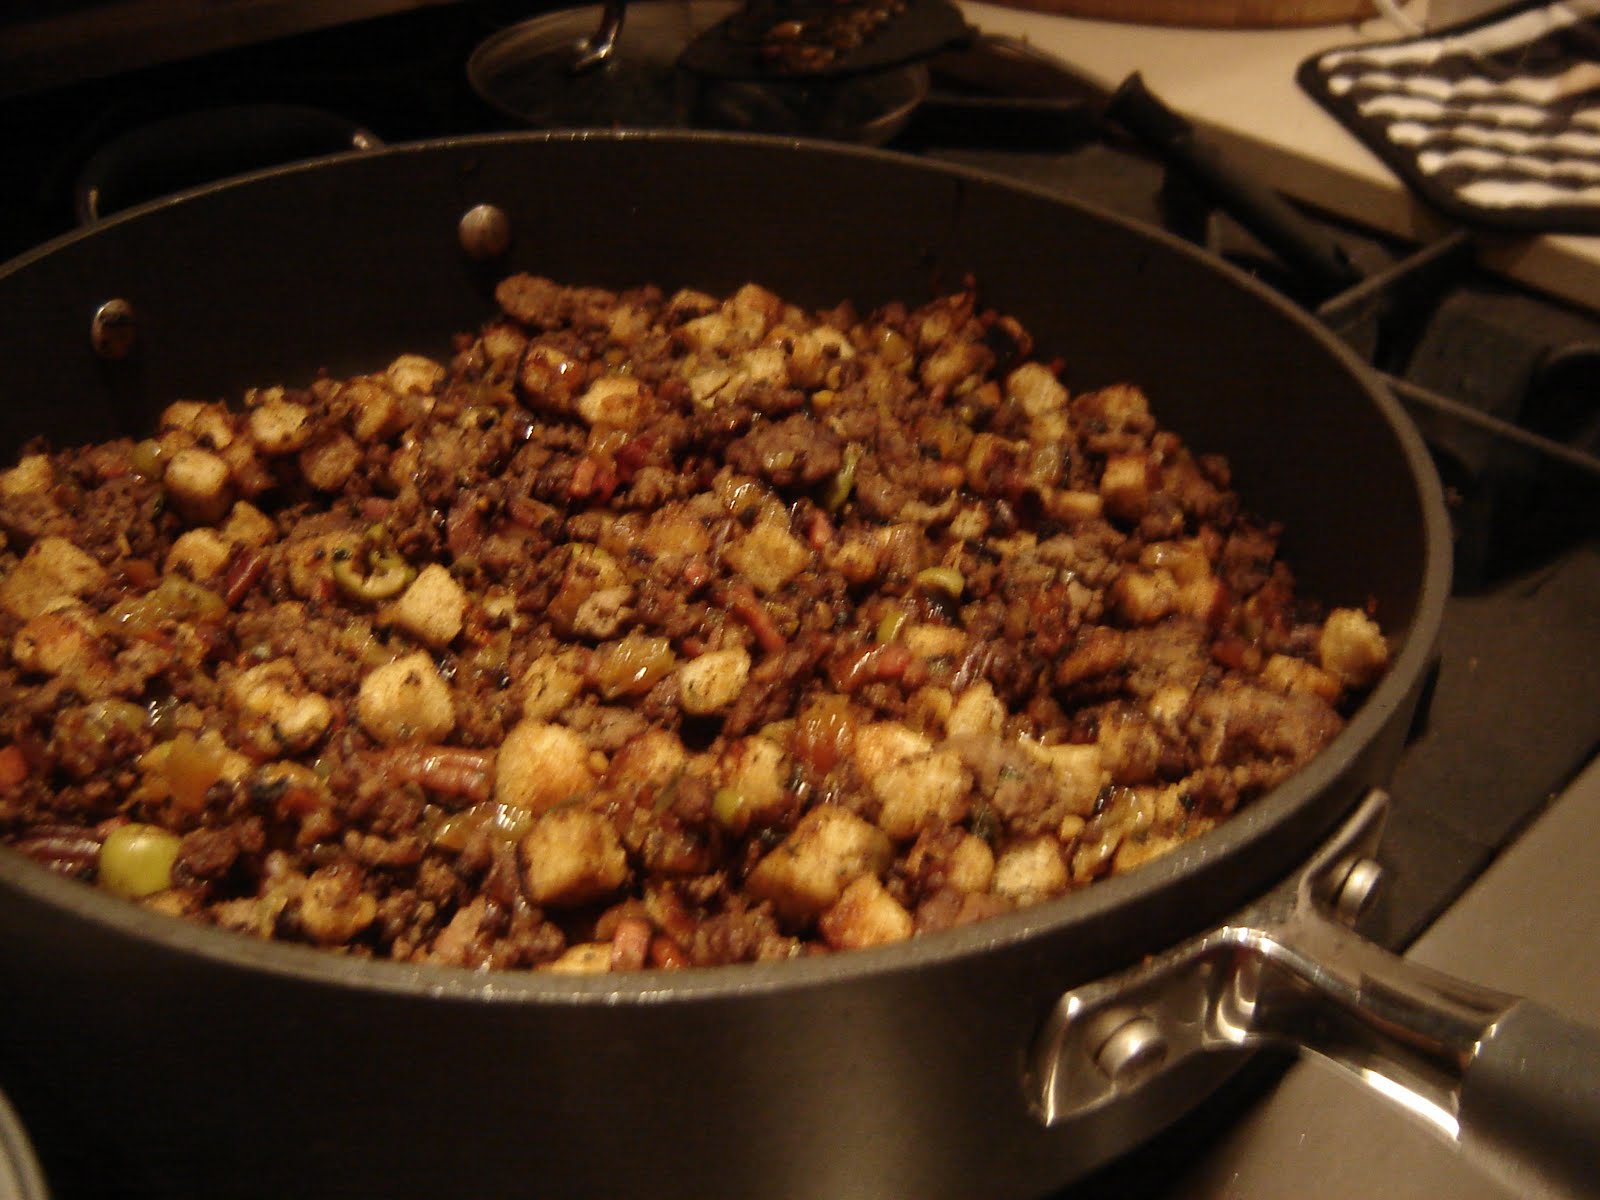
Meaty? Yes. This stuffing features meat. My Titi Janet has made this stuffing for Thanksgiving for years, and it has always been a family favorite. I have never tasted anything like it. I had to have it this year, and since she was not going to be flying out to California to make it for me, I had to take matters into my own hands. Janet emailed me the recipe, and I attempted to make it just the way she does.

I ran into one problem. I could not find one of the ingredients. This is some intense stuffing, people. It is not for sissies. I am pretty sure the ingredient list is the longest of anything I have ever made. Anyway, I could not find something called "Goya's jamon de cocinar en polvo" (oh yes, my Aunt Janet is from the Puerto Rican side of my family). Aside from being on the the list she sent me, I knew it existed only because I googled it. I went to about 4 different grocery stores (3 of which specialize in Hispanic foods), and no one had it or knew what it was. I know what each of those Spanish words mean in English (thank you Sra. Ajo); the literal translation would be "ham to cook in dust." I went ahead and took it as ham powder so I substituted a food that I thought would add just as much flavor, a food I have never regretted adding to any dish: bacon.

I cut this recipe in half since it was just for two, but I still had enough for about 8 servings. There are usually about 15 to 20 people at our Thanksgiving dinners so I would venture to guess this serves about that with leftovers. I suppose it is not technically stuffing because you do not cook it inside the turkey, but here it goes:

Titi Janet's "Will Leave You Seriously Stuffed" Stuffing:

3 – 4 lbs ground beef
½ to 1 c of cooking wine (I used a red table wine since I always have some on hand)
1 head of Garlic cloves
1 Onion
1 Bell pepper
3 packages of “Goya's jamon de cocinar en polvo” (Goya is the brand)*
3 packages of “Goya's Sazón con Azafrán” (Goya is the brand)
1 slice of cooking ham (with the bone) cut in ½” squares (I just bought some already diced ham)
1 bunch of fresh cilantro (chopped as fine as possible)
1 envelope of dry onion soup
2 cups (or to taste) of raisins (I copped them up really small since Zach hates when they bloat up. This made it so you could still taste them, but you don't get the soft soggy raisin texture when they are cooked)
2 cups (or to taste) of chopped pecans
Black pepper to taste
¼ cup of capers
1 cup of pitted stuffed olives or to taste
1/2 bag of “Pepperidge Farm Herb Seasoned Stuffing” (dry stuff)

*The Goya products are usually in the ethnic section of the grocery store"


Pour a bit of olive oil in a pot (so that the meat does not stick to the bottom when you start cooking). Cut the ham in cubes. Place the ground beef in the pot and cook until almost all brown making sure to mix the ground beef so that it does not “clump-up” while it cooks.
In a food processor or blender throw the cooking wine, black pepper, garlic, onion, bell pepper, Goya powders. Blend all together and pour in the meat with the dry onion soup and cilantro. If you do not have a food processor or blender, just chop the produce really fine.
Add the olives and capers, and continue to cook on medium for about 10-15 minutes.
Add the raisins, chopped pecans nd stuffing (mix well).
Continue cooking for another 10 minutes. The stuffing should absorb the “water/oil” from the beef while cooking.


Important note from Titi Janet: You will have to figure out the ratio between stuffing and ground beef. Just make sure it has the meat consistency more than the stuffing (mushy) consistency, but yet it is semi-mushy! And is more meaty than stuffing.

Important note from me: This turned out well for me. The bacon substitute seems to work out. I was nervous about making it and then not recognizing the taste as the same thing because it is indeed an extremely specific taste. I know it when I smell it! The part I struggled with here was since I was doing a bunch of things at one time, I think I let the meat cook too long without adding the rest of the ingredients. I think this caused it to dry out a little bit. It is important that everything stays really moist so that when you add the stuffing mixture, it has a lot of moisture to absorb.

Tuesday, November 24, 2009

Thanksgiving

Okay party people... One of the best days of the year is here. I am not gonna lie; it is all about the food.


This year, I spent weeks crafting the perfect menu. It was the first Thanksgiving for which I was in charge, and this is not a responsibility to be taken lightly. I searched for recipes all over the place. I emailed people for ideas and more recipes. I spent hours researching how to roast the perfect turkey. I made a huge menu list and then slashed things like I was making cuts at Gator football tryouts. After all, there was just going to be two of us.

Here is the rundown:

The Turkey:


The Stuffing
:


The Potatoes:


The Spinach Casserole:


The Biscuits:


The Pie:


We had the good fortune of being able to stay in a house in Palm Springs this Thanksgiving weekend. In fact, I write to you poolside in the warm desert morning weather.

Events of the day:

8:00 AM: I woke up (by choice). I flipped between some terrible morning shows with their terrible jokes and their irrelevant guests.

9:00 AM: Zach and I went to the Palm Springs Aerial Tram to take a gondola way up high into the desert mountains. We took a lovely 4 1/2 mile hike through Mount San Jacinto State Park. It was delightfully nippy. We saw a huge squirrel, 2 woodpeckers and 2 adorable deer.

One of the woodpeckers..I love the noise the pecking makes.


You can see the pair of deer between the trees on the right third of this picture.


1:00 PM: I started cooking. I put the turkey in the oven by about 2:30 PM after some prep work on the seasoning (and some mishaps with my now-i-don't-love-it-all-that-much food processor).

2:30 PM: I prepped the pie. This was stupid. I had a whole pie to bake (that needed to be cooled for hours before serving) while the turkey was in the oven. So one stupid thing led to another, and I baked the pie with the turkey in the oven at the same time. This threw off all I ever knew of cooking times. The pie took about an extra hour, and the turkey, well...we'll talk about that in a minute.

3:00 PM: I joined Zach to sit by the pool. The food was in the oven, and I could not start on the rest just yet since I wanted it to be warm when served. I started reading the book he just finished called " Radicals for Capitalism." If you know me, you know I read very little. I would like to read more, but it is just not what I choose to do with the little time I have free (or I am the slowest reader of all time). This book has about 700 pages. It will take me years.

4:00 PM: The pie finally came out of the oven. I started on the mashed potatoes, stuffing, and eventually the spinach casserole. I also started drinking some wine.

5:30 PM: I popped the biscuits in the oven and took the turkey out. The meat thermometer read only 160 degrees F at this point so I left the turkey in the oven.

5:35 PM: Zach and I danced around the living room to some oldies we had going on the radio.*

5:45 PM: The biscuits were done, but the turkey took another 20 minutes or so.

6:30 PM: Dinner is served.

*I apologize to Zach as I realize this will most definitely be embarrassing.


I am just going to include the recipe for the turkey here. I will be posting separate short ones for the side dishes and desserts shortly. This is really mostly a recipe for the seasoning which was very tasty. I meant to brine the turkey ahead of time, but it ended up being too high maintenance for me this year since I had to take my turkey to work Wednesday morning (since we were heading out of town from there) and then drive it across the desert in the back of my car with ice packs around it. I thought it best to leave it in its original sealed packaging for the trip. I had also planned on making a delicious gravy, but I scrapped that idea when the turkey too so long to roast. We were too hungry to wait for gravy.


10-12 pound turkey (thawed)
1 onion
8 cloves fresh garlic (separated)
1/4 C lemon zest (keep the rest of the lemon)
1/4 C packed fresh oregano leaves
1/2 tsp black pepper
2 tbsp canola oil
2 tbsp water
salt to taste
butter (for brushing over turkey)

Night before:
Take a thawed turkey out of original packaging, and remove plastic bags from the inside cavity (there may be two so be sure to take a good look in there).
Wash the turkey in cold water inside and out. Then pat dry.
Leave the uncovered turkey in the refrigerator for 8 to 10 hours.

Preheat oven to 350°F.
Place 4 cloves of the garlic, oregano, lemon zest, pepper, oil and water in a food processor. If you do not have one, just chop everything as fine as you can get it and then mix it all together.
Rub the paste all over the turkey, under the skin and on top. Sprinkle with salt.
Tuck the tips of the wings underneath the turkey.
Chop the remaining lemon and the onion, and place them along with the remaining 4 garlic cloves into the inside cavity.
Place the turkey breast side down on a rack in a roasting pan and put it in the oven for 1 hour.
After an hour, take the turkey out of the oven to turn in breast side up.
Brush the butter all over the turkey, and pour about 1 cup of water into the pan.
Place back into the oven, and roast turkey for 1 more hour.
Remove from the oven and baste turkey with the drippings in the pan.
Continue roasting for another 45 minutes or so (until a meat thermometer inserted into the thickest part of the breast registers 165°F.